Faqs
Содержание:
- Description
- Committers
- Can I use Chocolatey with existing installed software?
- What Are Chocolatey Packages?
- Comparison
- Графический интерфейс менеджера пакетов
- Why not use an existing Windows package manager?
- Chocolatey Installation
- Chocolatey. Что это такое? Как установить и как им пользоваться?
- Upgrading
- Package Gallery
- How To Pass Options / Switches
- Simple Server
- What is Chocolatey?
- Package Version Immutability
- Использование Chocolatey для установки программ в Windows
- АЦРК: Многовариантный автоматический запрет редактирования (для конфигурации УТ 10.3)
- Creating Packages
- Deploying Branding
- ChocolateyGuiBranding.dll
- Location of branding files
Description
This installs a Windows Service onto a machine. When provided a user name, this
will ensure that user exists, is in the Administrators group, and has all of the
correct privileges to run as a service. For more details on the privileges, see
the Username parameter below.
If a user is not a built in user and no password is provided, Chocolatey will
manage the password, which will be different for every machine and user and very
complex. For more details on the password, see the Password parameter below.
One of the additional advanced features of this function is being able to
upgrade a service without shutting it down first — Chocolatey will move the
current running service and put in all of the new binaries. It will require a
restart of the service to move to the new code, but you can upgrade a service in
place without shutting it down first (one time). To use this, you must supply
the DoNotReinstallService switch. See the parameter below for more details.
Committers
Committers, you should be very familiar with COMMITTERS.
Compiling / Building Source
There is a / file that creates a necessary generated file named . It must be run at least once before Visual Studio will build.
Windows
Prerequisites:
- .NET Framework 3.5 (This is a windows feature installation).
- .NET Framework 4+
- Visual Studio is helpful for working on source.
- ReSharper is immensely helpful (and there is a file to help with code conventions).
Build Process:
Run build.bat.
Running the build on Windows should produce an artifact that is tested and ready to be used.
Prerequisites:
- Install and configure Mono. Mono 5.20 or newer should work, see the Dockerfile for the currently recommended version.
# install prerequisites
sudo apt install apt-transport-https dirmngr gnupg ca-certificates
# add the key
sudo apt-key adv --keyserver hkp://keyserver.ubuntu.com:80 --recv-keys 3FA7E0328081BFF6A14DA29AA6A19B38D3D831EF

# add the package repository
# Debian 10
echo "deb https://download.mono-project.com/repo/debian stable-buster main" | sudo tee /etc/apt/sources.list.d/mono-official-stable.list
# Debian 9
echo "deb https://download.mono-project.com/repo/debian stable-stretch main" | sudo tee /etc/apt/sources.list.d/mono-official-stable.list
#Ubuntu 20.04
echo "deb https://download.mono-project.com/repo/ubuntu stable-focal main" | sudo tee /etc/apt/sources.list.d/mono-official-stable.list
# Ubuntu 18.04
echo "deb https://download.mono-project.com/repo/ubuntu stable-bionic main" | sudo tee /etc/apt/sources.list.d/mono-official-stable.list
# Ubuntu 16.04
echo "deb https://download.mono-project.com/repo/ubuntu stable-xenial main" | sudo tee /etc/apt/sources.list.d/mono-official-stable.list

# update package indexes
sudo apt-get update
# install
sudo apt-get install mono-devel -y
- Xamarin Studio is helpful for working on source.
- Consider adding the following to your (or other relevant dot source file):
# mono
# http://www.michaelruck.de/2010/03/solving-pkg-config-and-mono-35-profile.html
# http://cloudgen.wordpress.com/2013/03/06/configure-nant-to-run-under-mono-3-06-beta-for-mac-osx/
export PKG_CONFIG_PATH=/opt/local/lib/pkgconfig:/Library/Frameworks/Mono.framework/Versions/Current/lib/pkgconfig:$PKG_CONFIG_PATH
Set your permissions correctly:
chmod +x build.sh
chmod +x zip.sh
Build Process:
Run ./build.sh.
Running the build on Mono produces an artifact similar to Windows but may have more rough edges. You may get a failure or two in the build script that can be safely ignored.
Can I use Chocolatey with existing installed software?
Yes, yes you can. Chocolatey works in a similar manner to how you would do things if you downloaded and installed things yourself. Its design and infrastructure is built that way on purpose. It takes the pain of manually doing it yourself away (see previous section).

Now, Chocolatey can take over existing installs and be able to handle uninstalls in most cases. Can is very dependent on packaging and the underlying software installer that is used for the install ( are the context here).
Let me start by saying that testing how a single package won’t give you a warm and fuzzy about how it will work with all packages. Software installers in the wild world of Windows have many completely different ways of going about things, all of which are dependent on those creating the installers, none of which have a consistent standard (except maybe MSI). Welcome to Windows.
Now that we have baselined that — each piece of software out there is a special snowflake, so each package has to be able to account for differences in the installers.
So when a package takes over the existing install, if the registry snapshot doesn’t differ, it won’t be able to automatically uninstall it (if you have autoUninstaller turned on, check ). If there is no that would uninstall the software, choco won’t be able to uninstall it. At some point it will though, choco continues to get better at things. And at some point in the near future it will contain a check to do nothing for an install if a registry key exists (and record that for later uninstall).
The question I need to ask is whether you are worse off by adding choco into the mix? It handles upgrades for you. It brings about some level of consistency and a unifying interface to this madness that is the Windows installer infrastructure.
What Are Chocolatey Packages?
Chocolatey packages are known as nupkg files, which is a compiled NuSpec or a fancy zip file that knows about package metadata (including dependencies and versioning). These packages are an enhanced NuGet package, they have additional metadata that is specific to Chocolatey. Chocolatey is also compatible with vanilla NuGet packages. A Chocolatey package can contain embedded software and/or automation scripts.
Chocolatey packages are not just something fancy on top of MSI/Exe installers. Chocolatey definitely supports that avenue and, with the addition of unzipping archives, it is the most widely used aspect of Chocolatey, especially when you see the packages on the community feed (https://chocolatey.org/packages aka dot org). Chocolatey is about managing packages, and it works best when those packages contain all of the software instead of reaching out to external/internet resources for the software those packages represent. When you look at the community feed, you are seeing one representation of the way you can build packages, mostly driven by that govern when packages can redistribute software or not. Those distribution rules do not govern private/internal packages, so the rules are a bit different. Packages internal to organizations are wide open to do quite a bit more. You can do software embedded packages where executables are automatically added to the path (shimmed) and/or PowerShell automation scripts to do pretty much anything, including running native installers that may be embedded or downloaded as part of the automation script (again, one of the most widely seen aspects on dot org).
Packages with everything embedded are much more deterministic and repeatable, things most businesses require. You just won’t see that as often on the community feed due to the aforementioned .
The closer the underlying software a package represents is to the package (as in executables and files included in the package), the more Chocolatey behaves like a package manager.
Comparison
How is Chocolatey different than OneGet/PowerShell Package Management?
OneGet is a package manager manager, which means it is not really a package manager at all. Chocolatey will have a provider that plugs right into OneGet. At the current time there is a CTP available, but it is based on 2 year old Chocolatey technology (we’ve had security fixes since then, plus a world of features), so we can’t really recommend it. But if you must use it, make sure your PowerShell execution policy is set correctly and you are in an administrative console. See http://www.hanselman.com/blog/AptGetForWindowsOneGetAndChocolateyOnWindows10.aspx for more details.
Use ChocolateyGet for now.
How is Chocolatey different than NuGet and/or OpenWrap?
Chocolatey is a machine package manager. Where NuGet/OW are focused on developer library packages, Chocolatey is focused on applications and tools, and not necessarily developer focused.
A typical way of stating the difference is «Developers use NuGet to get 3rd party libraries that they use to build the .NET tools and applications that they release with Chocolatey!»
How is/will Chocolatey be different than apt?
- Chocolatey does not support the idea of source packages, which are packages that must be built to be used. For someone interested in that, check out https://github.com/Microsoft/vcpkg.
- Library packages are not completely off the plate, but mostly. How would you link the library up to the application/tool?
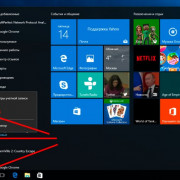
Графический интерфейс менеджера пакетов
Имеется возможность использовать и графический интерфейс Chocolatey для установки, удаления, обновления и поиска программ. Для этого введите choco install ChocolateyGUI и запустите установленное приложение от имени Администратора (появится в меню пуск или списке установленных программ Windows 8). Если вы планируете часто им пользоваться, рекомендую отметить запуск от имени Администратора в свойствах ярлыка.

Интерфейс менеджера пакетов интуитивно понятен: две вкладки, с установленными и доступными пакетами (программами), панель с информацией о них и кнопками для обновления, удаления или установки, в зависимости от того, что именно было выбрано.
Why not use an existing Windows package manager?
Believe me, I wanted there to be something existing on Windows that would fit the bill. Package management is not a glorious job. Especially on Windows. It’s taking all of the different native installers, archives, and straight executable downloads and making a simple interface for consumers to issue the same install command for all of them. Here are/were my needs:
- Good CLI that is simple to use.
- Main repository that takes packages contributions from the community (and is being maintained).
- Ability to use additional/multiple sources.
- Meta packages that can chain dependencies.
- Virtual packages.
- Packages should be easy to create / maintain.
- Packages should be concise and be able to be created without worrying about distribution rights.
- Unattended installs
- Installation of multiple packages with one command.
To date, Chocolatey does all of this (virtual packages is coming).
Chocolatey Installation
The request was aborted: Could not create SSL/TLS secure channel
If you see the following: Exception calling «DownloadString» with «1» argument(s): «The request was aborted: Could not create SSL/TLS secure channel.» then you are likely running an older machine that needs to be upgraded to be able to use TLS 1.2 at a minimum.
Chocolatey.org now requires TLS 1.2 at a minimum. Please see https://chocolatey.org/blog/remove-support-for-old-tls-versions. The post provides options if you have older clients that need to install Chocolatey.
The underlying connection was closed
If you see an error that looks similar to the following:
Chocolatey.org now requires TLS 1.2 at a minimum. Please see https://chocolatey.org/blog/remove-support-for-old-tls-versions. The post provides options if you have older clients that need to install Chocolatey.
Chocolatey. Что это такое? Как установить и как им пользоваться?
Как обычно вы устанавливаете программу в Windows? Вы находите нужную программу в интернете, скачиваете её с сайта (в лучшем случае с официального) и запускаете установку. Не редко вместе с программой устанавливаются не нужные вам дополнительные программы. Кстати, на сайте есть статья про то как защититься от таких установщиков.В Linux системах существует альтернативный подход к установке программ. Там используются специальные менеджеры пакетов, которые почти избавляют вас от необходимости скачивания программ из интернета. К тому же можно подключать несколько различных репозиториев.Chocolatey — это репозиторий с программами для windows 7 и выше. Он предоставляет те же преимущества, что и менеджеры пакетов в Linux. На данный момент этот репозиторий насчитывает уже более 8000 популярных программ.
Как установить?
- Windows 7+ / Windows Server 2003+
- PowerShell v2 +
- .NET Framework 4+ (при установке будет предпринята попытка установить .NET 4.0, если он у вас не установлен)
Установить его можно выполнив специальную команду. Команду нужно выполнять либо в командной строке CMD.exe либо в PowerShell.exe. Оба должны быть запущены с правами администратора. Вот сами команды:
- Для CMD.exe
- Для PowerShell.exe
После установки, Chocolatey можно обновить точно так же, как любой другой пакет, который был установлен с помощью Chocolatey. Просто используйте команду для обновления до последней стабильной версии Chocolatey:choco upgrade chocolatey
Как пользоваться менеджером пакетов Chocolatey
А как узнать какая команда какую программу устанавливает? Посмотреть команды для каждой программы можно в самом хранилище пакетов https://chocolatey.org/packages.
Обновление и удаление программ установленных с помощью репозитория
Обновить программу установленную с помощью Chocolatey очень легко. Для этого в PowerShell можно выполнить команды:Для обновления всех программ — choco upgrade allДля обновления только браузера Chrome — choco ugprade googlechromeДля того, чтобы просто проверить, есть ли обновления для установленных программ, без самого обновления, можно воспользоваться командой choco outdatedДля удаления программы выполните команду choco uninstall «имя программы», например для Google Chrome это будет команда choco uninstall googlechrome
Другие полезные команды
Есть ещё команды, которые возможно будут вам полезны. Команда choco list -lo выводит список всех программ установленных в систему из менеджера пакетов.Поиск программ в репозитории можно произвести командой choco search «имя программы». Если нужная программа есть в хранилище, то мы получим его имя и уже потом легко сможем его установить.
Графический интерфейс Chocolatey
Для тех пользователей, которые не привыкли использовать командную строку есть графический интерфейс Chocolatey. Для его установки, вам, все же придется сначала установить стандартный версию, а потом с помощью команды choco install chocolateygui установить графический интерфейс.Если увидите строчку Do you want to run the script?(es/ll — yes to all/o/rint):, то наберите букву «Y» и снова нажмите «Enter».Запустить графический интерфейс можно с помощью ярлыка «Chocolatey GUI» в меню Пуск. У Chocolatey GUI есть некоторые ограничения в отличие от консольной версии, но с каждой версией в него добавляют новые возможности. На данный момент он умеет:
- Отображать список программ, установленных на локальном компьютере из репозитория
- Устанавливать / удалять / обновлять / закреплять / откреплять пакеты Chocolatey
- Добавлять / удалять источники
- Включать / отключать функции Chocolatey
- Изменять значения конфигурации Chocolatey
- Изменять отображение на Список и мозаичный вид установленных / доступных пакетов
В графическом интерфейсе слева в боковом меню, нажав на кнопку Chocolatey можно просмотреть каталог программ. Здесь можно искать программы и установить нужную одним кликом, не используя консольную оболочку PowerShell. А выбрав вкладку Этот ПК слева вы увидите все программы, которые были установлены в систему с помощью Пользуйтесь этим инструментом друзья. Он достоин этого.
Upgrading
Upgrade the Extension
To upgrade the licensed edition just run the following code:
choco upgrade chocolatey.extension (plus options like -y for scripts)
Your license automatically adds the licensed source.
How Do I Upgrade the License File?
You would simply place the new license file on top of the existing license file, overwriting it. This can be done in many ways, the recommended way is to create a package for the license itself. See as part of the organizational deployment guide.
How Do I Upgrade the Trial Edition?
You can upgrade your licensed components as long as your Trial license is still valid.
Please reach back out to your Chocolatey Software contact to request an extension if necessary.
Package Gallery
This is like what https://chocolatey.org (the community feed runs on). It is the most advanced, having both a file store for packages and a database for tracking all sorts of information.
Advantages
- Can deal with thousands of packages with no performance issues.
- Package versions are immutable — in other words you can guarantee the version installed is the same as the version in the source.
- Package store can be File system, Azure blobs, or AWS S3 (S3 available with Chocolatey Package Gallery only).
- Multiple users each having their own API keys.
- User registration with email confirmation.
- Interaction and collaboration based.
- Can have administrators.
- Can take advantage of moderation (Chocolatey Package Gallery only).
- Package statistics (download counts, etc).
- A website to view package information.
- Can be configured to send email.
- Can manage PowerShell gallery type packages.
Disadvantages
- Speed of setup (can take longer than the rest). There are many moving parts to configure.
- Requires Windows/IIS/SQL Server/SMTP (hopefully with the proper licenses on each of those).
- Not well-documented, could require some diligence to get working.
- A package should not be bigger than 150MB. You can host the installer internally somewhere and access it through packaging though. Package size can be controlled through maxAllowedContentLength and maxRequestLength.
Package Gallery Setup
Only approach this if you are a Windows Admin with significant experience in setting up SQL Server databases and IIS for ASP.NET MVC sites. We don’t have resources to help support the setup, but we can point you to NuGet Gallery Setup.
Chocolatey Package Gallery Setup
At this time we don’t have setup instructions and are not keen to answer questions specifically surrounding the setup of a Chocolatey Gallery (the code behind chocolatey.org). This is due to specific necessary settings regarding the community packages repository and tight integration to what it offers. Chocolatey for Business is likely to offer a gallery at some point, depending on prioritization.
How To Pass Options / Switches
You can pass options and switches in the following ways:
- Unless stated otherwise, an option/switch should only be passed one
time. Otherwise you may find weird/non-supported behavior. - , , or (one character switches should not use )
-
Option Bundling / Bundled Options: One character switches can be
bundled. e.g. (debug), (force), (verbose), and
(confirm yes) can be bundled as . -
Use Equals: You can also include or not include an equals sign
between options and values. -
Quote Values: When you need to quote an entire argument, such as
when using spaces, please use a combination of double quotes and
apostrophes (). In cmd.exe you can just use double quotes
() but in powershell.exe you should use backticks
() or apostrophes (). Using the combination
allows for both shells to work without issue, except for when the next
section applies. -
Pass quotes in arguments: When you need to pass quoted values to
to something like a native installer, you are in for a world of fun. In
cmd.exe you must pass it like this: . In
PowerShell.exe, you must pass it like this: .
No other combination will work. In PowerShell.exe if you are on version
v3+, you can try before to just pass the args through as is,
which means it should not require any special workarounds. -
Periods in PowerShell: If you need to pass a period as part of a
value or a path, PowerShell doesn’t always handle it well. Please
quote those values using «Quote Values» section above. - Options and switches apply to all items passed, so if you are
installing multiple packages, and you use , choco
is going to look for and try to install version 1.0.0 of every
package passed. So please split out multiple package calls when
wanting to pass specific options.
Simple Server
There is where the bulk of NuGet OData compatible servers fall (NuGet.Server, Chocolatey.Server, etc). There are simple servers that are very enhanced, which fall into the section.
- Since Chocolatey just uses an enhanced version of the NuGet framework, it is compatible everywhere you can put a NuGet package.
- We recommend Chocolatey.Server if you are choosing between these options.
- A simple server typically has one repo per instance and manages only Chocolatey / NuGet packages.
Known Simple Server Options
- Chocolatey.Server (recommended)
- NuGet.Server
- TeamCity has built-in Simple Server
- Visual Studio Team Services (NuGet v2 endpoints) — Setup (Remove the part of the url that is /v3/index.json and use /v2 instead) — you may also need to setup a personal access token.
- NuGet.Java.Server (NuGet Package) — simple server (same tool used in TeamCity)
- PHP NuGet
- Hazel
- LaGet
- Klondike
- Visual Studio Team Services (use NuGet v2 urls)
If the option you’ve chosen is not listed, take a look at and follow the link from there to see what the vendor provides in the way of documentation.
Advantages
- Setup can be really simple — just a website and IIS for some simple servers.
- Windows is not required — there are at least two pure Java versions (see ).
- Push over HTTP / HTTPS/TLS.
- Authentication / Authorization:
- API key for pushing packages.
- Basic Authentication with IIS.
- No direct access to packages so security can be locked down to just modify through push.
- Package store is file system.
- Can manage PowerShell gallery type packages.
Disadvantages
- May only have one API key per repository.
- Starts to affect performance once the source has over 2,000 packages for some sources. It depends on how they keep that information (in a db or file scans).
- Authentication is typically limited to Basic Auth.
- No moderation.
- May not have a website for viewing package information. Use ChocolateyGUI for seeing package information.
- No package statistics for most of the simple server sources.
- Package size may be limited to 28.61MB by default on some simple servers. Depending on your simple server — For IIS simple servers package size can be controlled through maxAllowedContentLength and maxRequestLength. For others like Nexus, it may already be set very high. You can host the installer internally somewhere and access it through packaging though.
The actual limit for package sizes varies depending on what each simple server can handle (usually determined by the limitation of pushing a package to the server). If you determine what those are, we’d be happy to list each one here.
Chocolatey.Server Setup
Please see Set up the Chocolatey.Server. More details below on what this option provides.
Chocolatey Simple Server is a simple Nuget.Server that is ready to rock and roll. It has already completed Steps 1-3 of NuGet’s . Some things to consider with Chocolatey.Server as compared to other options:
- Uses same enhanced NuGet that Chocolatey uses so you can see more information in search if you choose to use those things.
- Allows packages up to 2GB. Package size can be controlled through maxAllowedContentLength and maxRequestLength.
NuGet.Server Setup
Setting up NuGet.Server is very much a hands on approach for a packaging server — it requires Visual Studio as you will be adding the NuGet package to a Website project. We recommend looking at Chocolatey.Server as it is nearly the same thing but fully ready to go (and with Chocolatey enhancements).
Many google searches will throw out good ways to set up your own feed (hint: search for «host your own NuGet server feed»)
Some notable references:
- Nuget Docs
- itToby — Setup Your Own Chocolatey/NuGet Repository
- Rich Hopkins — Bake your own Chocolatey NuGet repository
- Brandon — Host NuGet Server in Azure
What is Chocolatey?
Chocolatey helps good developers and system administrators become outstanding developers/sysadmins. Chocolatey goes to eleven.
Chocolatey is something you need if you’ve ever installed, upgraded, or removed software on Windows. It is an existing, proven, project that was started in 2011. For those familiar with *nix package managers, it is a binary package manager, sort of like yum or apt-get, but for Windows. The words «binary package manager» can be confusing for those who don’t know what that means, but bear with me for a few minutes. Chocolatey is a tool that automates all the mundane getting and installing software work for you. You just select what you want installed and within a few minutes, Chocolatey has downloaded and installed (or upgraded) that software without need for further input from you. So while Chocolatey does the hard work, you can go get some coffee. Or sleep. Or do other more important things.
This may not seem very powerful at first, but imagine when you want to upgrade all of the software on your system to the latest, most secure versions, how do you do that now? Right. Manually:
- Search for most recent version
- Pick (hopefully) the right download
- Wait for it to download
- Unblock it
- Install it manually (next, next, next anyone?)
- Hope it didn’t install any malware
- Now do it again for EVERY piece of software on your system.
Now contrast that with how you do the same with Chocolatey:
- Open command line.
- Type
- Walk away

Package Version Immutability
A package version is immutable on some sources. This means that everybody’s version 1.0.1 of a particular package is the same. You do not need to worry about this when updating with newer versions of packages, because each package version compiled nupkg has the unique version in the name (e.g vs ).
Package immutability is usually desired, because then you know that everyone on v1.0.0 of a package has exactly the same code as does even everyone else. Even a broken version v1.0.0 gives you a global understanding that everyone who has v1.0.0 has exactly the same bits. This really simplifies administration. Without immutability, there is no guarantee that a version of a package installed is the same as the version of the package at the source.
Использование Chocolatey для установки программ в Windows
Обычный способ установки программ на компьютер для пользователей Windows — скачать программу из Интернета, после чего запустить установочный файл. Все просто, но есть и побочные эффекты — установка дополнительного ненужного ПО, дополнений браузера или изменение его настроек (все это может быть и при установке с официального сайта), не говоря уж о вирусах при загрузке с сомнительных источников. Кроме этого, представьте, что вам нужно установить сразу 20 программ, хотелось бы как-то автоматизировать этот процесс? Примечание: Windows 10 включает в себя собственный менеджер пакетов OneGet (Использование OneGet в Windows 10 и подключение репозитория Chocolatey), также в 2020-м был представлен диспетчер пакетов Winget.
АЦРК: Многовариантный автоматический запрет редактирования (для конфигурации УТ 10.3)
В этой статье описывается усовершенствованная технология автоматической установки даты запрета редактирования
Во-первых, можно определить несколько стратегий запрета редактирования с разными параметрами. Например, запрет в днях, запрет доступа в предыдущие месяцы кварталы и т.п., с указанием отступа от текущей даты.
То есть для некоторых пользователей (рядовых менеджеров) при входе в базе будет устанавливаться запрет по вчерашний день, для других (старших менеджеров) на 5 дней назад, для третьих (администраторов базы или руководителей отдела) — запрет предыдущего месяца с отступом в 10 дней..
Во-вторых, запрет будет устанавливаться для ВСЕХ без исключения пользователей базы данных. Для самых привилегированных это будет максимальная глубина, но запрет будет установлен.
Управление этой системой осуществляется через механизм дополнительных прав пользователей.
При необходимости пользователь с полными правами может открыть для себя закрытый период, но только на текущий сеанс работы.
1 стартмани
Creating Packages
Install-ChocolateyPath doesn’t seem to work.
I added , but after installing when I try to run the installed application I get «not recognized as the name of a cmdlet, function, script file, or operable program.» Please see .
ERROR: Cannot bind parameter because parameter ‘fileType’ is specified more than once.
This error is seen sometimes on versions of Chocolatey older than 0.10.6. The problem is likely you have the following in your packaging:
didn’t have both a parameter and a parameter. PowerShell has a «feature» where it does partial matching of parameters. When you splat the parameters in, it tries to apply both and to and throws the above error.
Typically, when you are installing locally, you likely want to use anyway.
Reference: https://groups.google.com/d/msgid/chocolatey/40736df7-7f3f-4be7-929d-1606be0e3a62%40googlegroups.com (you will need to join the group to see the message)
ERROR: This package does not support 64 bit architecture.
This message is from https://github.com/chocolatey/choco/issues/527 — it is when the url value chosen is empty. This is common when you are creating a package and you forget to use splatting, instead passing the variable in as the first positional parameter to a function.
This means you have set up your arguments for a function and then called something like instead of . Note is for splatting, taking the values in the hash variable and using the key/values to pass those each as parameters to a function, where just passes the entire hash as the first parameter of the function.
References:
- https://github.com/majkinetor/au/issues/70
- https://groups.google.com/d/msgid/chocolatey/5c544e16-e1b2-4249-bad6-4591017df81b%40googlegroups.com (you will need to join the group to see the message)
- https://github.com/chocolatey/chocolatey-coreteampackages/issues/439 (separate issue)
This is similar to the above, the error is the same. In most cases it stems from setting up your package parameters for but calling instead. Learn the differences at the PowerShell function reference.
Reference: https://groups.google.com/d/msgid/chocolatey/d11d8eb2-74b3-4c2c-b0bb-d1a1ed3df389%40googlegroups.com (you will need to join the group to see the message)
ERROR: A null key is not allowed in a hash literal.
Typically you see this if you accidentally use a variable name on the left side of a hash:
Note the use of on the left side, which should be just . Once you fix that, things should start working appropriately.
Reference
Deploying Branding
What follows is a suggestion on how a branded version of Chocolatey GUI can be
deployed out to your environment.
-
Follow the steps above to place the branding image assets into the correct location.
-
Run the Chocolatey GUI application to generate the ChocolateyGuiBranding.dll
-
Create a new folder on your file system to house the branding Chocolatey Package
-
In this folder, create a folder
-
Copy the generated into this folder
-
Copy the following xml into a file called .
-
Copy the following PowerShell into a file called
-
Copy the following PowerShell into a file called
-
Copy the following PowerShell into a file called
-
Run the command
-
Deploy the generated to the repository that you are using
-
Install the Chocolatey GUI Branding package
ChocolateyGuiBranding.dll
The first time Chocolatey GUI, with the Chocolatey GUI licensed extension installed,
is executed, and the above asset files are in one of the defined locations, a new
file will be generated in the same location called .
The new file actually contains all the image files that were created, as they have
been embedded as resources within this assembly file. This approach is used in
order to optimize the loading of the assets. Once this ChocolateyGuiBranding.dll
has been created, Chocolatey GUI will use it each time the application runs. The
original image asset files are actually no longer required, and can be removed.
If at any point you need to re-generate the branding that is being used, simply
delete the following two files:
- ChocolateyGuiBranding.dll
- ChocolateyGuiBranding.resources
Then update, your image asset files, and re-run Chocolatey GUI and the branding
assembly will be re-generated.
Using a single ChocolateyGuiBranding.dll as the source of branding makes it very
simple to generate and distribute this assembly to apply branding across your
entire organisation.
Location of branding files
In order for your custom branding files to be applied, you must place the above
files into one of two specific places.
Default Location
By default, Chocolatey GUI will look for custom branding files in the Chocolatey
installation directory (normally , and then in a folder
called . i.e. it will look in the following folder:
Custom Location
It is possible to use a custom location by first settings an environment variable
called to a new location. For example, if you created
this environment variable with a value of , then Chocolatey GUI
would then expect to find the above asset files in this location: