Windows usb/dvd download tool
Содержание:
- Ошибки USB/DVD Download Tool
- Как пользоваться
- Возможности
- Скачать
- How to Use Windows USB/DVD Download Tool to Install Windows
- Windows USB/DVD Download Tool Download
- Get Windows with the Windows Migration Tool
- Пожертвования
- Free Windows installation program
- Запуск загрузочной флешки на ПК
- (1) Сравнение скорости работы Rufus и других приложений
- What Is Windows USB/DVD Download Tool
Ошибки USB/DVD Download Tool
Так же я хотел бы уделить такой теме как возможные ошибки при установке образа на съемный носитель или компакт диск.
И приведу несколько самых распространенных примеров их решения.
Первая ошибка у вас может возникнуть, когда вы выбрали образ системы и перешли на следующий пункт и вдруг появляется окно с вот таким текстом «The selected file is not a valid ISO file» или на русском «Выбранный файл ISO-образа не является таковым»
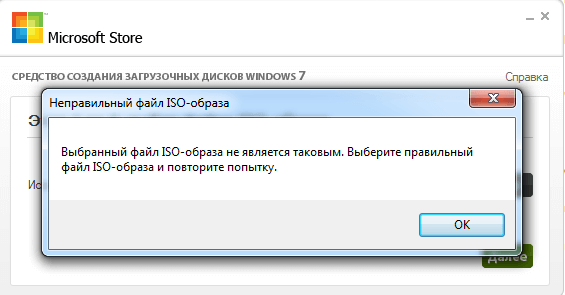
Появилась данная ошибка потому что образ операционной системы был поврежден и исправить его можно с помощью другой утилиты под названием «PowerISO»
С помощью данного софта вам необходимо разархивировать образ и с помощью той же программы пересоздать образ. С помощью данных манипуляций можно решить эту проблему, но, если образ операционной системы был не сильно поврежден, если это не помогло то вам придется скачивать другой образ.
Следующая ошибка может быть самой распространенной при записи Windows 7/8/8.1/10 64 –х разрядной версии на съемный носитель!
Прочитайте ее внимательно, и тогда у вас получится исправить ошибку. Если у вас появилась Ошибка «Files copied successfully. However, we were unable to run bootsect to make the USB device bootable. If you need assistance with bootsect. please click “Online Help” link above for more information.»
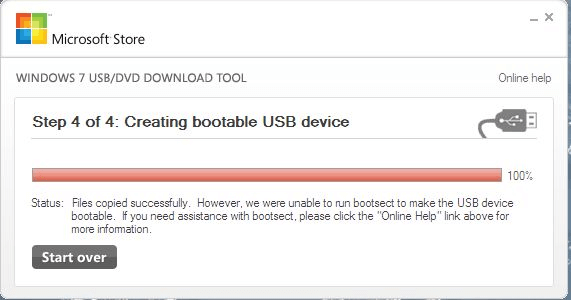
Я не буду длительно обрисовывать эту ошибку, так вот она возникает когда вы желаете записать на USB-флешку Windows 7 или Windows 8 64-х разрядный но при всем этом записываете его на Windows 7 32-х разрядном.
Для решения этой ошибки, Вам необходимо скачать на просторах интернета следующий файл: «bootsect.exe» если вы его не найдете в интернете то он точно будет в Windows 7 32-разрядной. Так вот это файл необходимо поместить по адресу «C:\Users\Имя_пользователя\AppData\Local\Apps\Windows 7 USB DVD Download Tool» при это если у вы не меняли путь при установке программы.
После того как вы поместите файл «bootsect.exe» в каталог Windows 7 USB DVD Download Tool, вы сможете без проблем записывать разные версии Windows будь то 32-х или 64-х разрядная система. После этого ваша программка станет более полезной и уникальной.
И теперь мы можем сделать вывод, что нет надобности нести компьютер в сервисный центр если можно переустановить Windows самому, и оказалось, что не так и трудно записать образ операционной системы на носитель с помощью Windows USB/DVD Download Tool, и я уверен, что после проделанной вами такой работы вас не составить труда переустановить операционную систему на компьютер, но это уже скорей это другая темы и мы ее обсудим в следующих статьях…
Как пользоваться
Переходя к делу, давайте рассмотрим, как скачать программу, установить ее, а также создать загрузочную флешку с Windows 7.
Загрузка и установка
Изначально давайте загрузим и установим приложение для ПК или ноутбука:
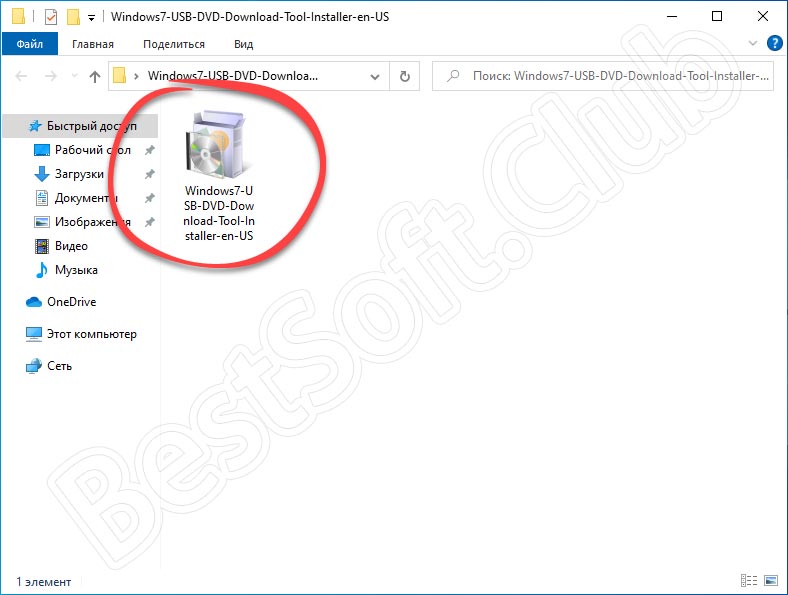
- Перейдите в самый конец странички и нажмите кнопку, которая находится сразу после таблицы. Распакуйте полученный архив и запустите исполняемый файл, который найдете в нем.
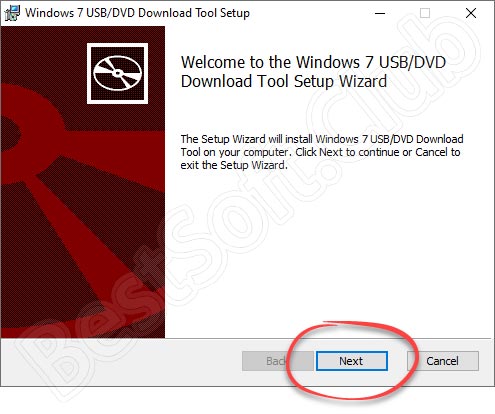
- На первом этапе инсталляции нам потребуется лишь кликнуть по кнопке, которая обозначена на скриншоте.
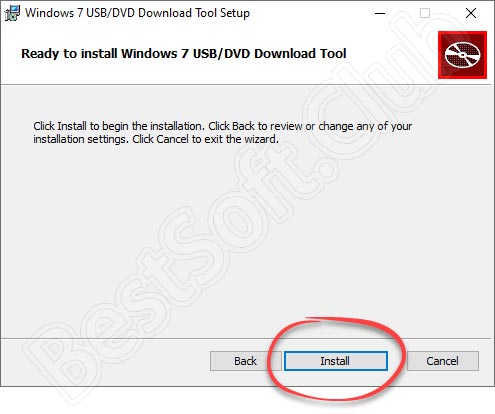
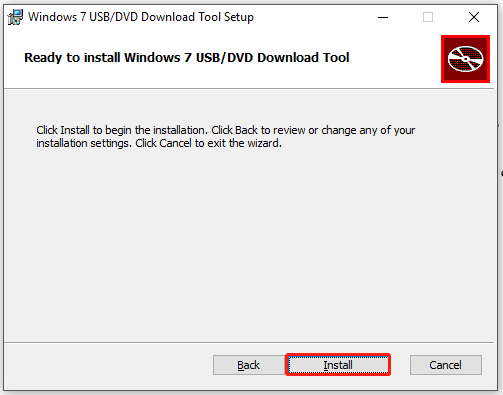
- Перейдя дальше, запускаем процесс установки, нажав на «Install».
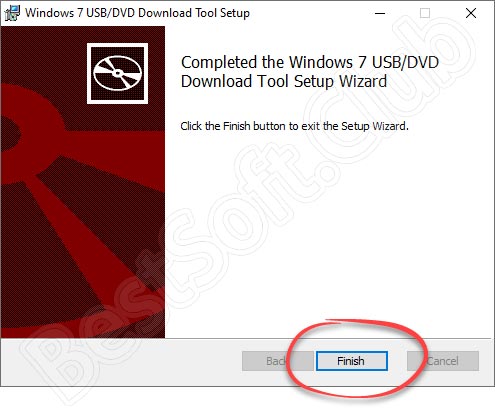
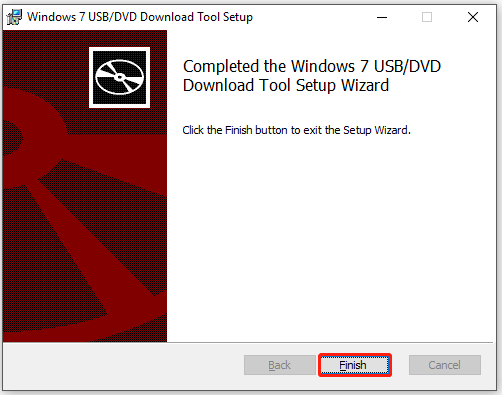
- Через пару мгновений установка будет завершена и пользователю останется закрыть инсталлятор. Для этого нажимаем на единственную активную кнопку.
Теперь, когда установка завершена, мы можем рассматривать процесс использования Windows 7 USB/DVD Download Tool.
Инструкция по работе
Для того чтобы сделать загрузочную флешку с Windows 7 через Windows 7 USB/DVD Download Tool нужно поступить следующим образом:
- Сначала запускаем утилиту от имени администратора. Для этого производим правый клик мышью по появившемуся на рабочем столе ярлыку и из контекстного меню выбираем нужный пункт.
- Когда приложение запустится, кликаем по кнопке выбора образа с Windows 7. Соответственно, подразумевается, что последний уже скачан из интернета. В результате откроется окно проводника, в котором мы указываем файл и подтверждаем выбор.

- Устанавливаем накопитель в USB-порт компьютера либо вставляем оптический диск в привод. Переходим к следующему этапу, нажав на кнопку, обозначенную красной стрелкой.
- Выбираем устройство, на которое будет вестись запись. Как уже было сказано, программа позволяет работать с DVD-дисками или USB-накопителями. Мы будем использовать последний, поэтому кликаем по соответствующей кнопке.
- В выпадающем списке выбираем накопитель, на который будет вестись запись. Затем запускаем процесс, кликнув по отмеченной на скриншоте кнопке.
- Программа предупредит нас о том, что с накопителя, который выбран в качестве целевого, будут удалены все данные. Подтверждаем свое намерение.
- В результате начнется процесс записи Windows 7 на флешку. Пользователю остается лишь дождаться, пока он будет завершен.
Уже через несколько минут вы получите загрузочный накопитель, при помощи которого можно произвести установку операционной системы от Microsoft.
Возможности
Перед проверкой Roofus в деле важно ознакомиться с характерными особенностями и спецификой данной программы. Главная функция приложения – создание и запись ISO-образа на диске или Flash-накопителе
В качестве основы для «прожига» используются boot ISO файлы. Приложение поддерживает полный цикл работы с образами, включая их открытие и изменение содержания.
Руфус 3 создает полноценную копию «Винды», начиная от легендарной XP и заканчивая последней десятой версией. Кроме того, приложение работает с ISO-образами игр. Программа записывает на внешний носитель полноценный образ физического диска. Скорость «прожига» загрузочного девайса через Rufs на порядок выше, чем у аналогичных образцов (например, UltraISO).
Приложение обладает набором функций, выгодно отличающих его от конкурентов:
- Низкие системные требования, включающие поддержку большинства «операционок»: от Windows XP до Виндовс 10;
- Создание boot девайса для ноутбука или ПК независимо от встроенной BIOS;
- Возможность использования записанного USB-накопителя для восстановления доступа к системе или снятия защитного пароля;
- Запуск и работа на ПК без установленной операционной системы;
- Наличие portable версии продукта, где отсутствует процесс установки;
- Поддержка различных внешних носителей для «прожига» образа: начиная от флеш-карт и заканчивая компакт-дисками;
- Высокие показатели скорости при записи ISO на USB и чтении данных;
- Полностью бесплатный способ распространения.
Преимущества
Программисты Rufs выделяют 3 основных преимущества приложения:
- Предельно понятное и простое меню, по которому легко и приятно перемещаться;
- Специальная функция находит «битые» участки на «флешке» и предлагает форматировать носитель для полного восстановления работоспособности;
- Утилита позволяет быстро создать boot device. Полный цикл работы занимает намного меньше времени, чем при записи встроенными инструментами системы.
У миниатюрной, но важной утилиты имеется дополнительное полезное свойство, на которое редко обращают внимание. Чтобы скачать образ Windows на компьютер, совсем не обязательно бороздить просторы интернета в поисках нужного варианта. Для этого необходимо в меню «Свойства диска» переключить соответствующую вкладку «Выбрать» на значение «Скачать» и активировать данный пункт
Пользователю откроется специальное окно, где можно задать желаемые параметры для образа Виндовс ОС. После настройки характеристик и подтверждения действий она автоматически найдет подходящую копию «операционки», скачает ее на ПК и запишет на требуемый носитель информации
Для этого необходимо в меню «Свойства диска» переключить соответствующую вкладку «Выбрать» на значение «Скачать» и активировать данный пункт. Пользователю откроется специальное окно, где можно задать желаемые параметры для образа Виндовс ОС. После настройки характеристик и подтверждения действий она автоматически найдет подходящую копию «операционки», скачает ее на ПК и запишет на требуемый носитель информации.
Полезно знать!
Скачать программу Rufus для Windows совершенно бесплатно можно по закрепленным на странице ссылкам. Кроме того, получить Руфус можно на torrent ресурсах, если скачать торрент файл.
Список ISO-образов, с которыми Rufus умеет работать
Нередко при записи ISO to flash пользователю требуются сторонние программы с функцией автозапуска при старте Windows OS
Здесь важно указать список совместимых образов, с которыми работает Руфус
Скачать
Последнее обновление 2021.08.03:
- Rufus 3.15 (1.1 МБ)
- Rufus 3.15 Переносная версия (1.1 МБ)
- Другие версии (GitHub)
- Другие версии (FossHub)
Поддерживаемые языки:
| Bahasa Indonesia | , | Bahasa Malaysia | , | Български | , | Čeština | , | Dansk | , | Deutsch | , | Ελληνικά | , |
| English | , | Español | , | Français | , | Hrvatski | , | Italiano | , | Latviešu | , | Lietuvių | , | Magyar | , | Nederlands | , | Norsk | , |
| Polski | , | Português | , | Português do Brasil | , | Русский | , | Română | , | Slovensky | , | Slovenščina | , | Srpski | , |
| Suomi | , | Svenska | , | Tiếng Việt | , | Türkçe | , | Українська | , | 简体中文 | , | 正體中文 | , | 日本語 | , | 한국어 | , | ไทย | , |
| עברית | , | العربية | , | پارسی | . |
Системные требования:
Windows 7 или более поздней версии, неважно, 32 или 64 бит. После загрузки приложение готово к использованию
Я хочу выразить мою благодарность переводчикам, которые перевели Rufus, а также эту веб-страницу на различные языки. Если вы обнаружите, что можете пользоваться Rufus на вашем родном языке, вы должны благодарить их!
How to Use Windows USB/DVD Download Tool to Install Windows
With an installation media, you can install a new copy of Windows, perform a clean installation, or reinstall Windows.
Note: Make a backup for your important data before installing or reinstalling Windows on your computer.
Part 1: Preparation
To obtain an installation media, you need to get the items below.
- A computer with a reliable and stable Internet connection. The specific download time varies according to your Internet condition.
- A USB flash drive or DVD. You should prepare an empty DVD (and DVD burner) or USB flash drive with a capacity of 8GB or more. If you are told that the disc image file is too large while burning a DVD from an ISO file, you should utilize dual-layer DVD media instead.
- A product key. You can find your product key by referring to this post: Complete Guide: How to Find Windows 10 Product Key
Now, download a system version from Microsoft according to your demand and then move to the next part to create installation media. Here, we take Windows 10 as an example.
Tip: If you want to get Windows 7, click here. For Windows 8.1 and Windows 10, click the respective buttons.
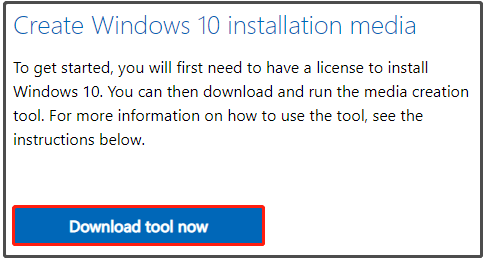
To create Windows 10 installation media, you can click Download tool now on its official website to get the Windows 10 Media Creation Tool.
Part 2: Get Windows Installation Media
After downloading the Windows 10 Media Creation Tool, double-click on its setup file and go through the following steps.
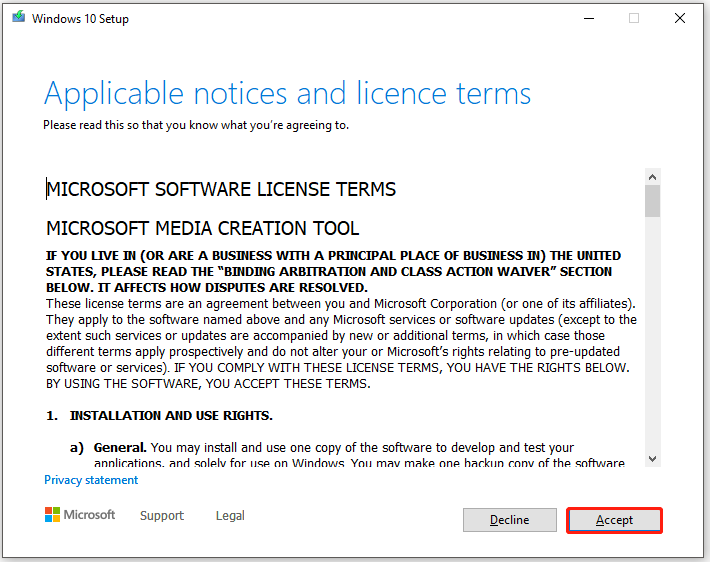
Step 1: Learn about the Microsoft Media Creation Tool license terms and click Accept.
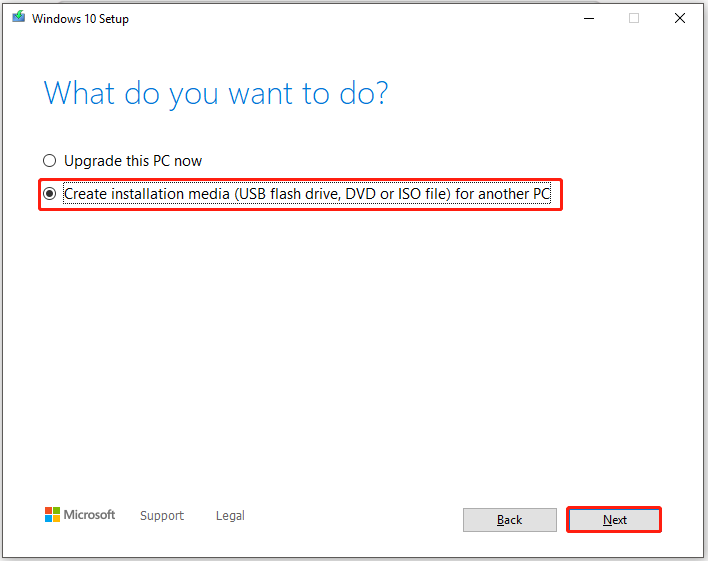
Step 2: In the next window, choose Create installation media (USB flash drive, DVD or ISO file) for another PC and click Next.
Step 3: Choose language, architecture, and edition based on your demands and click Next.
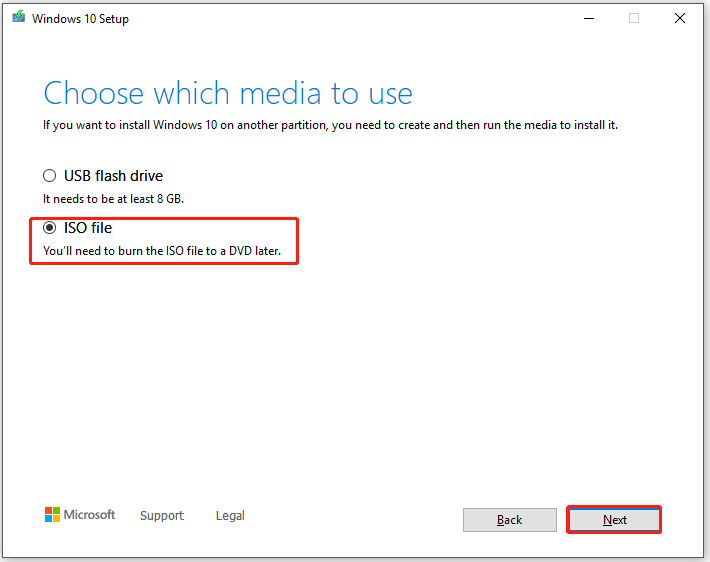
Step 4: Select ISO file in the Choose which media to use window and click Next.
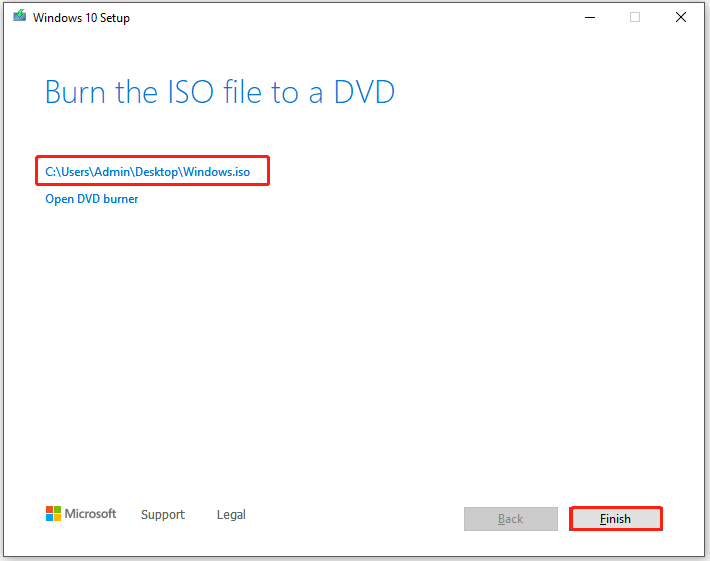
Step 5: Wait for the finish of the process. As the process may take you some time, you need to wait patiently. After it ends, you will get the following window. Choose the first option and click Finish.
Tip: If you prepare a DVD, you should select Open DVD opener.
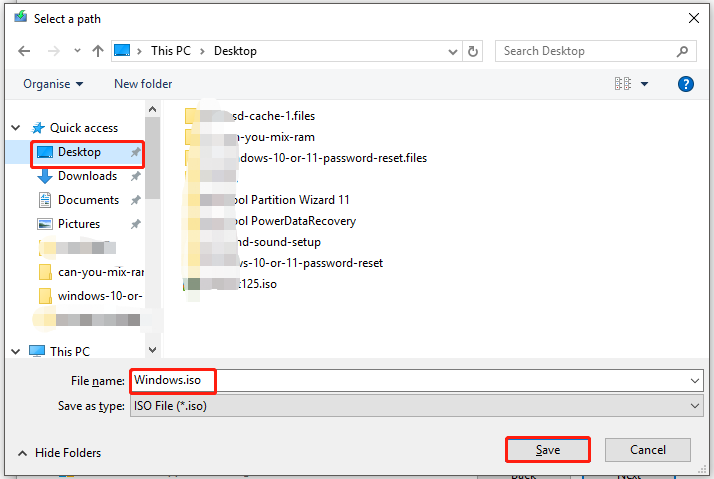
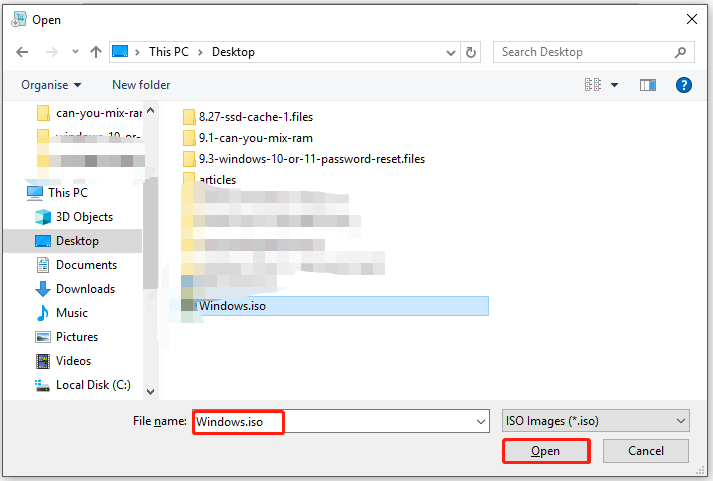
Step 6: Then you will be prompted with a window. In this window, choose a position for the created installation media. For example, you can select Desktop in the left pane and set a filename in the corresponding place. Finally, click Save to execute the operation.
Part 3: Create a Bootable USB Device via Windows USB/DVD Download Tool
Connect a USB flash drive to your PC and then begin the process.
Warning: As the USB flash drive would be erased during the copy process, you should ensure that it doesn’t contain any important data. If it has, back up the data with a USB image tool in advance.
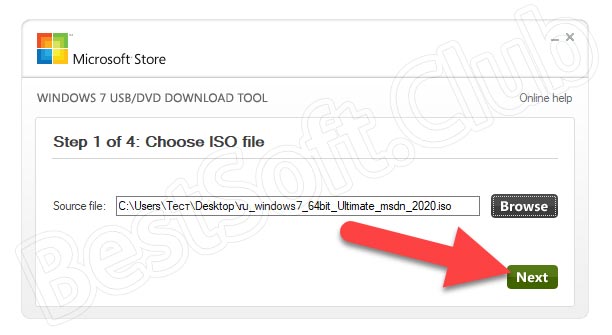
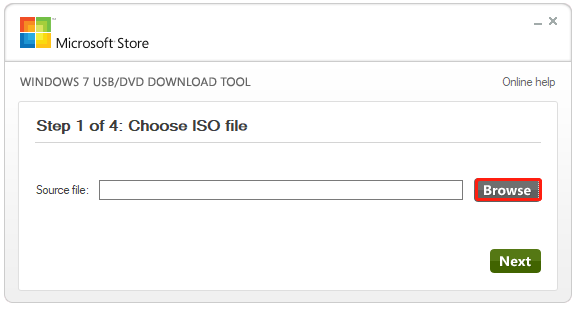
Step 1: Run Windows 7 USB/DVD Download Tool from your disk and then click Browse in the pop-up window.
Step 2: In the Open window, choose your Windows iso file and click Open.
Step 3: After backing to the previous window, click Next to continue.
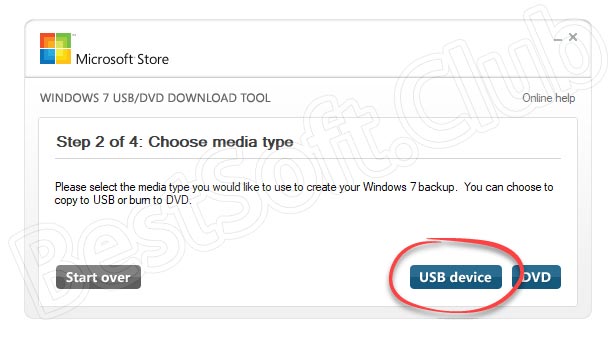
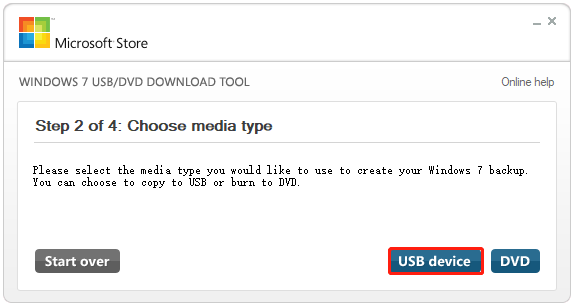
Step 4: Select USB device. If you use DVD, then pick DVD.
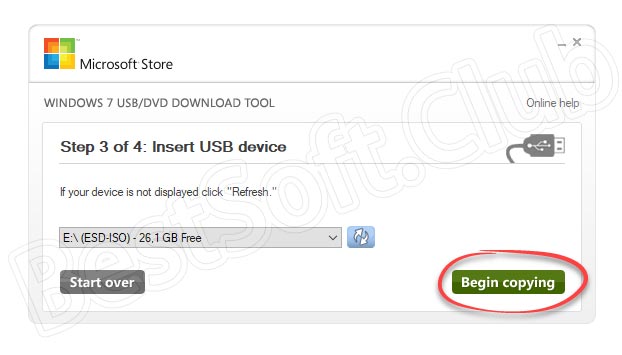
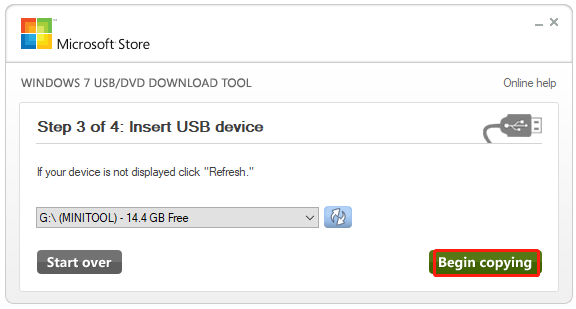
Step 5: Choose your USB device from the drop-down menu and click Begin copying.
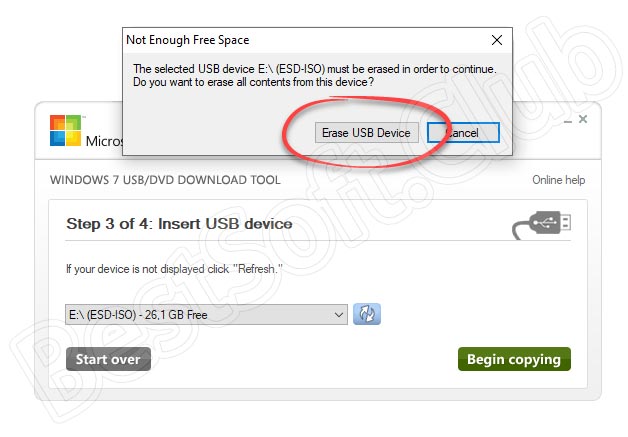
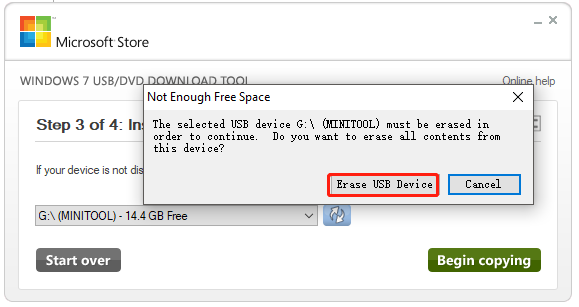
Step 6: Click Erase USB Device to confirm the operation.
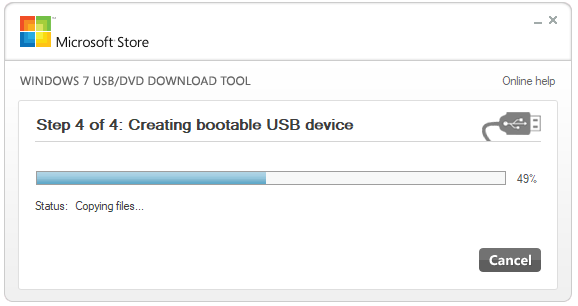
Step 7: You can view the progress of creating bootable USB device. Once the process ends, click the X icon at the upper right corner of the window.
Part 4: Install Windows
Plug the bootable USB drive into your computer and turn on the device. During the startup process, keep pressing a BIOS key to enter BIOS. Then set the USB as the first boot and follow the given steps to install Windows.
Note: You won’t be able to use your PC while installing Windows. Besides, save and close your files before you start the operation.
Step 1: Double-click on the Setup file in the USB drive to run it.
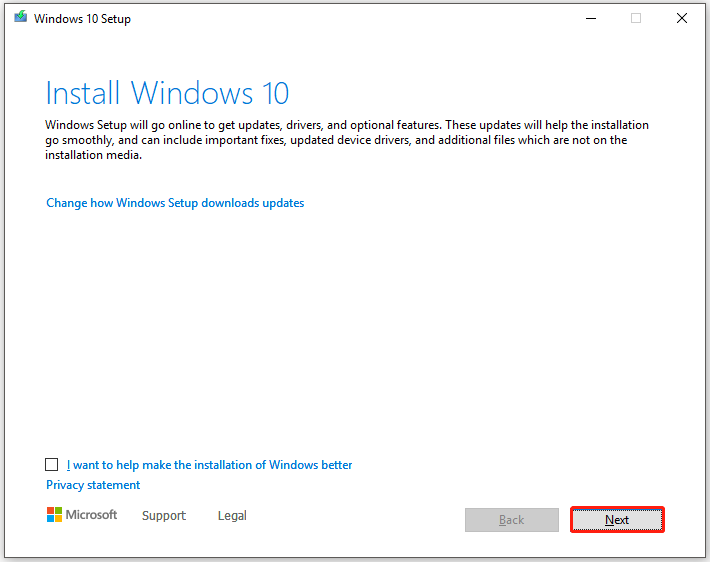
Step 2: Click Next in the prompted window.
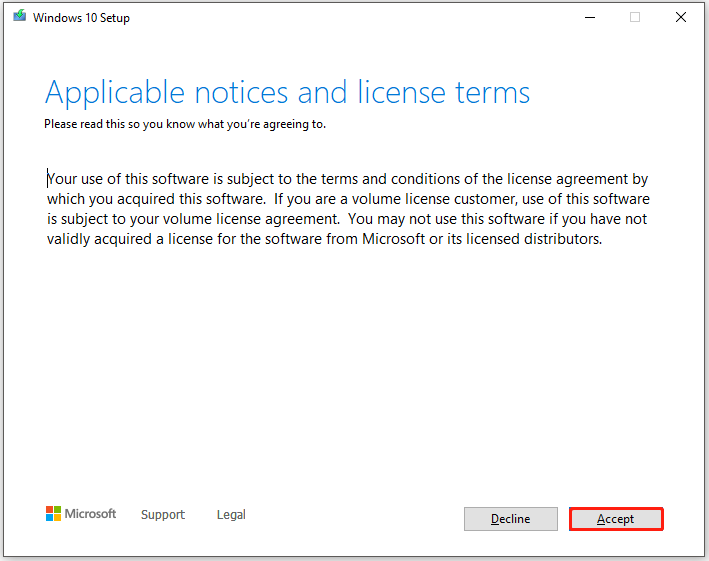
Step 3: Click Accept in the Applicable notices and liencese terms window to continue.
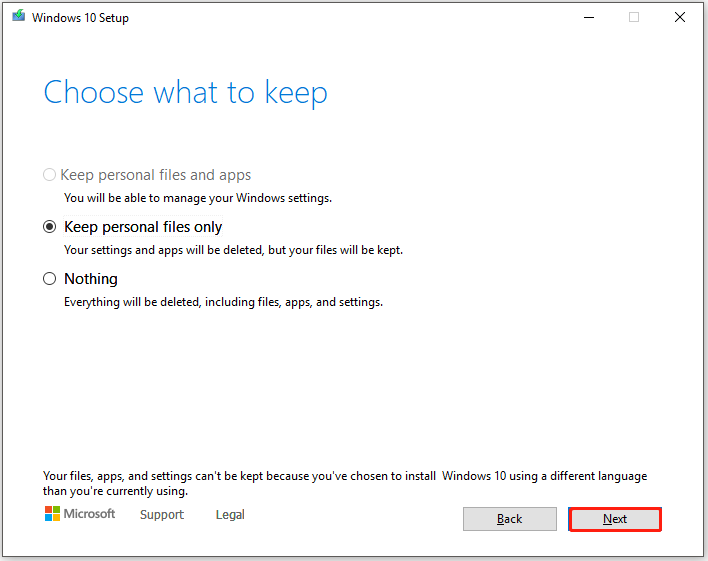
Step 4: Click Keep personal files only or Nothing and then click Next.
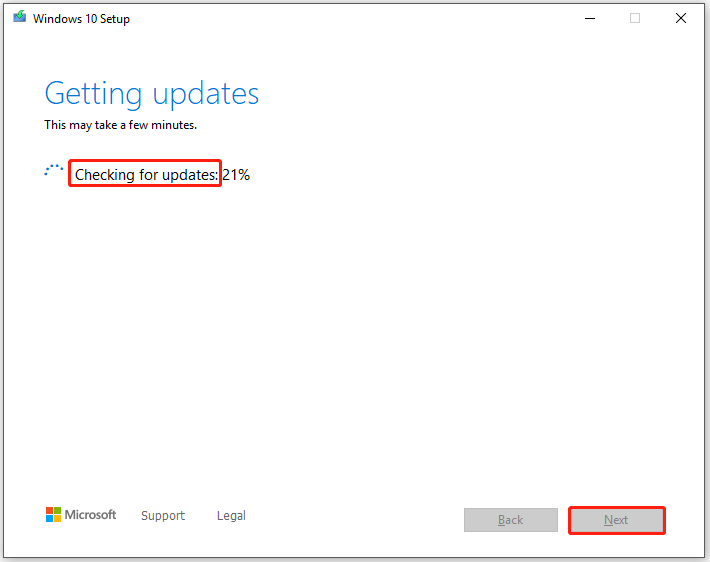
Step 5: Then the program will check for updates automatically. After it finishes, click Next.
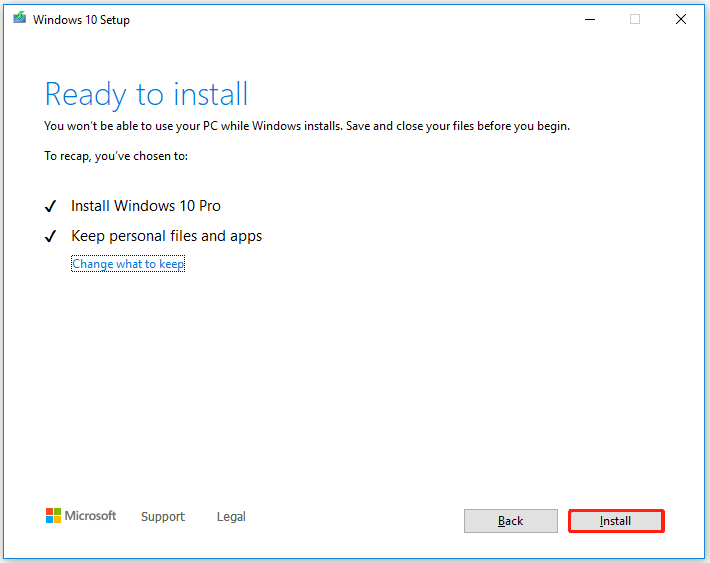
Step 6: Click Install to begin the installation.
Step 7: Then you can view the installation progress. You just need to wait and follow the on-screen instruction to complete the process.

Windows USB/DVD Download Tool Download
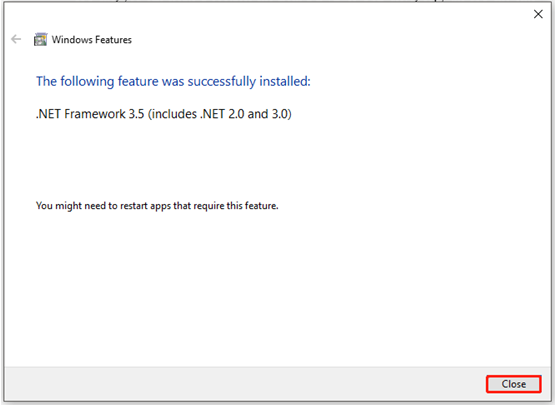
To perform a Windows USB/DVD Download Tool download, you need to get the Microsoft .NET Framework 2.0 or higher. For that, you can click here to get it. Double-click on its setup file and follow the on-screen instruction to download the required files. After that, install the program. You will receive the following window after the installation ends. Click Close to exit.
Now, follow the offered steps to download Windows USB downloader tool.
Step 1: Click here to download Windows USB/DVD Download Tool
Tip: Though it reads “Windows 7 USB/DVD Download Tool”, it works properly on Windows 10.
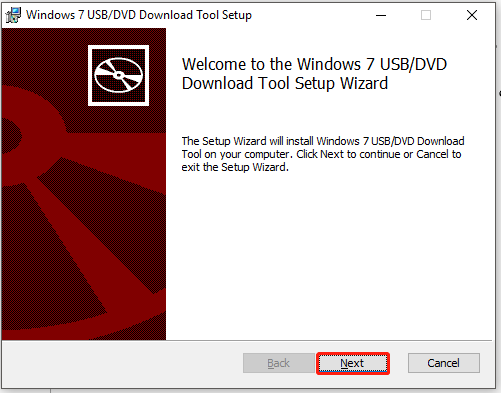
Step 2: Double-click on the downloaded setup file and click Next.
Step 3: Click the Install button in the next window to begin the installation.
Step 4: After you receive the following window, click Finish to end the process.
SSD Cache | How to Use SSD as Cache on AMD and Intel Systems
What is SSD cache? This post offers you the answer and some extra information about it. Then, it tells you how to use SSD as cache on AMD and Intel systems.
Read More
Get Windows with the Windows Migration Tool
Though you can install Windows with the bootable USB device created by the Windows 7 USB/DVD Download Tool, the process is time-consuming and complicated. Read here, you may wonder if there are any available methods to get Windows quickly.
The answer is absolutely “Yes”. For example, you can obtain Windows within a few clicks with a Windows migration tool. MiniTool Partition Wizard is such a tool. The Migrate OS to SSD/HD Wizard feature of this program enables you to get Windows easily.
Certainly, the Copy Disk feature also helps you do that operation. Besides, MiniTool Partition Wizard also allows you to convert MBR to GPT, rebuild MBR, recover missing data, perform disk benchmark, etc.
Note: You are required to get the MiniTool Partition Wizard Pro Edition or higher editions to migrate OS and copy system disk. To get more details, please refer to this comparison chart.
To do that, you need to find a person who runs Windows 10 and download & install MiniTool Partition Wizard on his PC.
Step 1: Connect the hard drive of the computer that you want to install Windows to the computer running Windows 10.
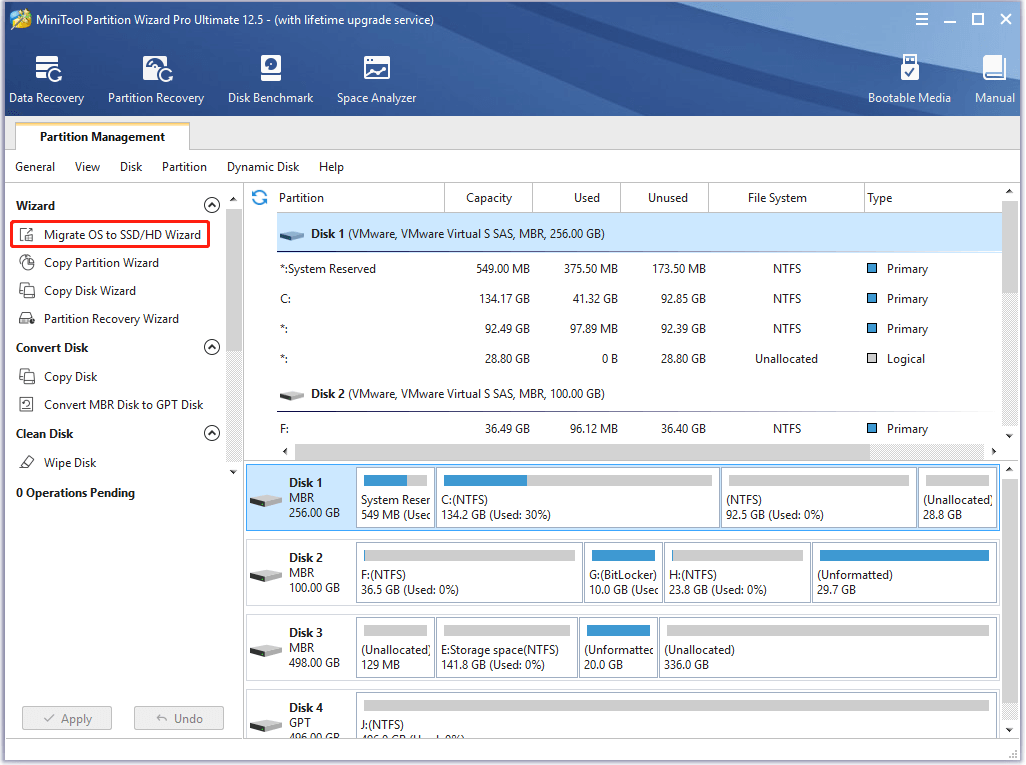
Step 2: Launch MiniTool Partition Wizard to access its main interface.
Step 3: Click on the Migrate OS to SSD/HD Wizard option in the action panel.
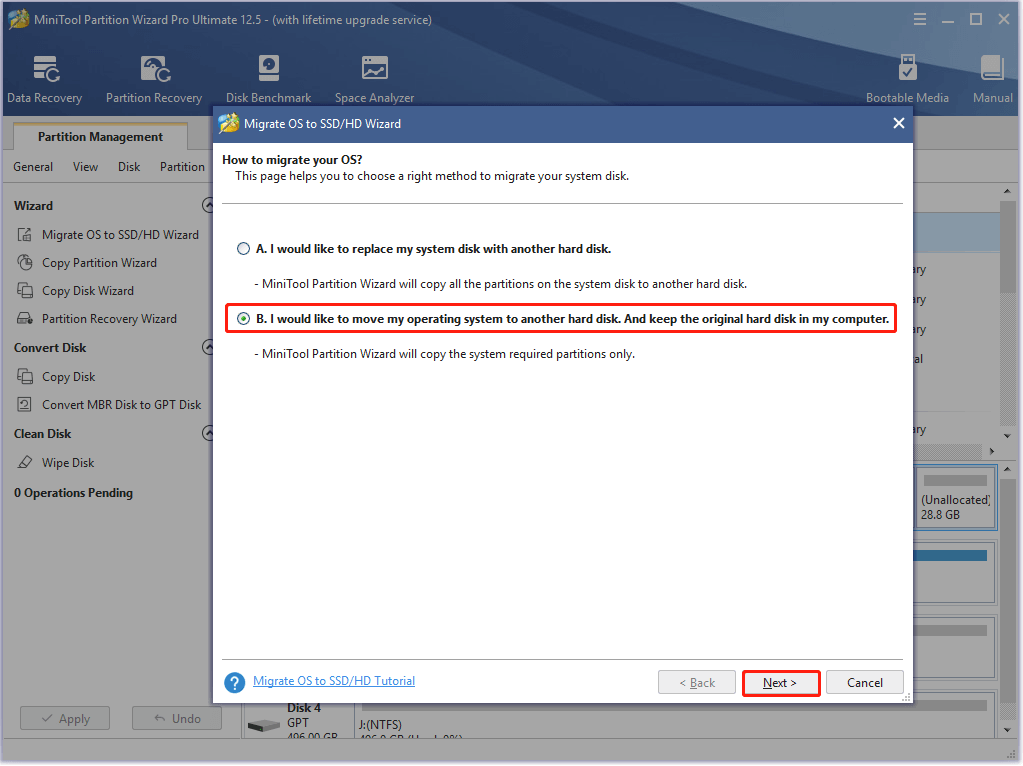
Step 4: Choose a way to migrate OS in the next window. Here, you need to choose the Option B: I would like to move my operating system to another hard disk. And keep the original disk in my computer. Then click Next to move forward.
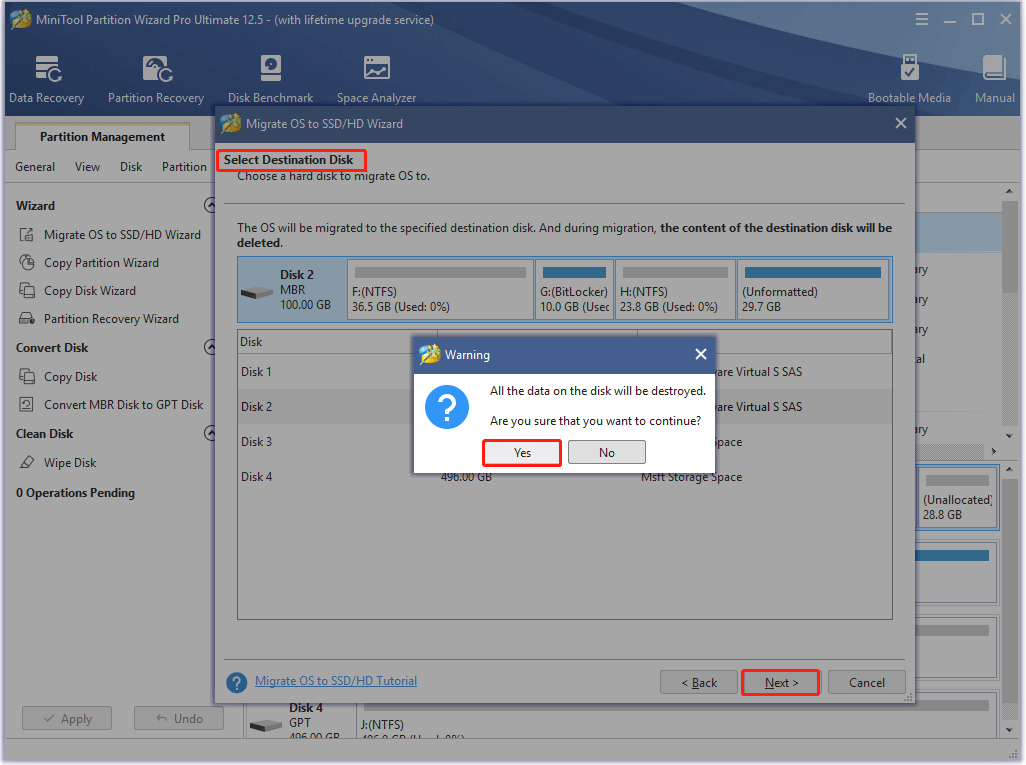
Step 5: Choose the connected disk as the destination drive and click Next. If you confirm that the connected drive doesn’t have important data, click Yes to go on. On the contrary, you should back up the data and then click Yes.
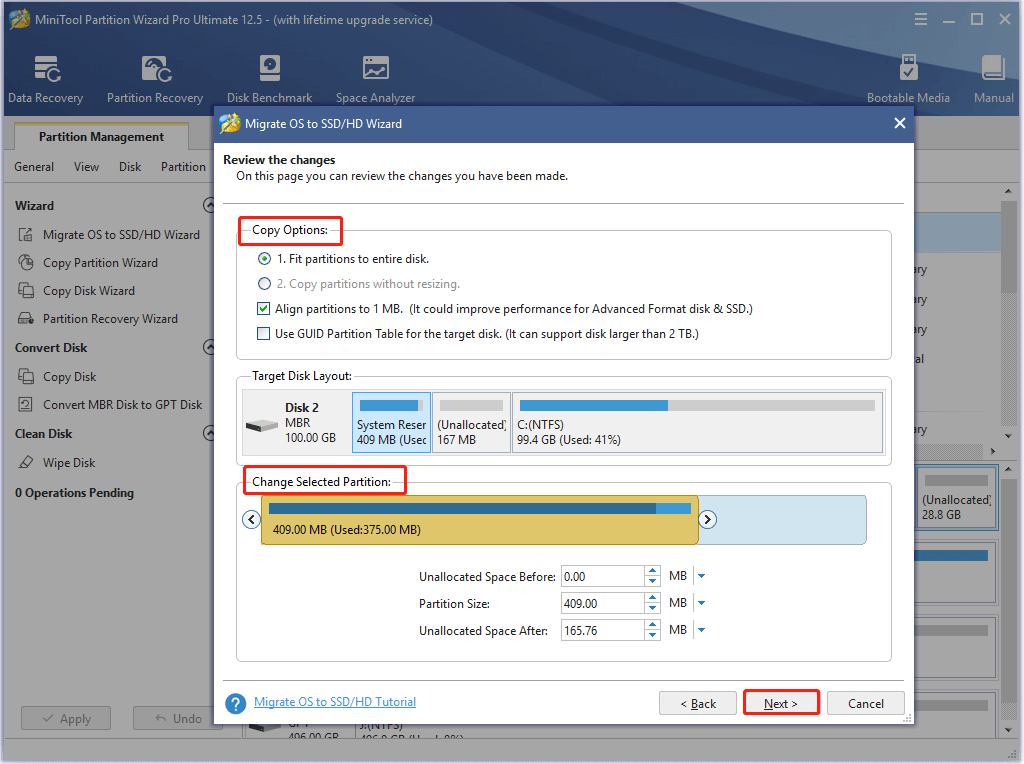
Step 6: Choose copy options and configure the location and size of the selected partition based on your demands. For example, if the destination disk is SSD, it is recommended to pick the Align partitions to 1 MB option. Then, click Next.
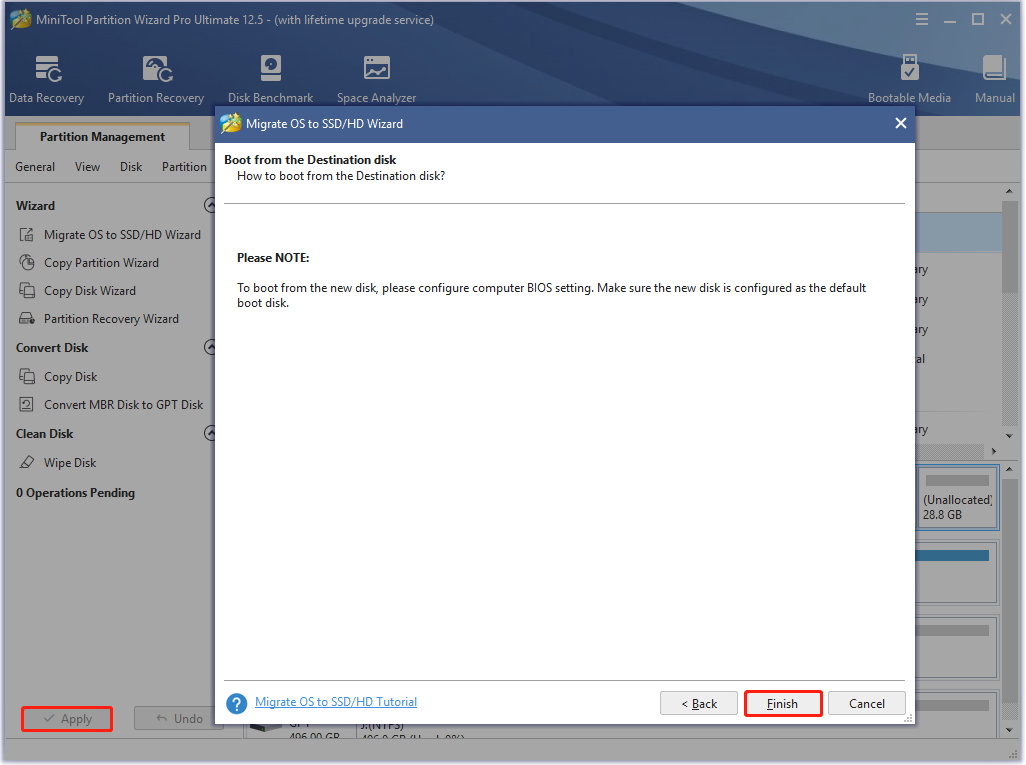
Step 7: Click the Finish and Apply buttons to save and execute the operation.
Пожертвования
Поскольку постоянно задаются вопросы о пожертвованиях, поясняю, что на странице нет кнопки пожертвовать.
Причина отсутствия возможности пожертвовать заключается в том, что, по моему мнению, пожертвования не помогают в разработке программного обеспечения, а только вызывают чувство вины у пользователей, которые не пожертвовали.
Если вы все же настаиваете, то всегда можете сделать пожертвование в Free Software Foundation, так как именно благодаря FSF является возможным создание Rufus.
В любом случае, я хочу вам сказать спасибо за вашу постоянную поддержку и энтузиазм, связанные с этой небольшой программой: для меня это очень важно!
Пожалуйста, продолжайте пользоваться Rufus безвозмездно, без каких-либо пожертвований – вы ничего не должны!
Free Windows installation program
Windows 7 USB DVD Download Tool is a free utility program that creates bootable USB flash drives or DVD for Windows 7 32- and 64-bit operating systems. When people install Windows systems from the Microsoft Store, they can either download a collection of compressed installation files or an uncompressed ISO file; the freeware is developed by Microsoft to install the ISO file onto a PC machine.
Does Windows 7 USB DVD Download Tool work Windows 10?
The application functions with Windows 7, , and systems along with Windows Vista and XP SP2 models. If the Windows XP users intend to operate the app, then there are applications to install before: Microsoft .NET Framework 2.0 and Microsoft Image Mastering API v2. Along with the Windows USB DVD Download Tool, people will need to have purchased and downloaded the Windows ISO file.
The system requires 50 MB of storage space on the hard disk as well as a DVD-R drive or removable USB device with a minimum of 4 GB available. Essentially, users need the ISO file, the download tool, and either the blank DVD drive or the 4GB or higher USB.
How do I convert Windows ISO to USB?
The lightweight platform has an easy to use interface; fundamentally, the program is created for people who are not adept in technical skills for them to perform the process. If the Microsoft community does need assistance, then within the user interface there is an ‘Online help’ option. Essentially, the tools Windows offers in the app are presented in four steps.
Each step is displayed on a small and simple interface. Lining the top of the tool is the distinction of which step the user is on within the procedure. Upon the download, Windows greets people with a screen that reads ‘Step 1 of 4: Choose ISO file’. Below the instruction is a space to either insert or searches for the source file with the browser.
Once the article is retrieved, ensure that the encased space presents the correct information. If the data is accurate, then press the green ‘Next’ button in the bottom right corner to continue. The setup continues into ‘Step 2 of 4’ on the following page: ‘Choose media type’.
The directions inform the community that they can either burn the ISO file to a DVD or copy the uncompressed file to a USB Pendrive. If people are using the USB backup, then they need to utilize a USB that has 4GB or more to ensure that the file size is compensated for.
To be allowed to continue, select either ‘USB device’ or ‘DVD’ in the lower right corner. Confirm that the DVD or USB is placed into the computer. Note that there is a ‘Start over’ button presented in the lower-left section to restart the boot order. Step 3 includes a dropdown menu to verify the inserted media.
If the USB or DVD information is not visible, then there is a refresh key that can be chosen beside the menu. Ensure that any content that is within the external devices is safely copied to another location. If there is data on the equipment, then a message will appear to notify the user that there is not enough disk space to continue.
How do I create a bootable flash drive?
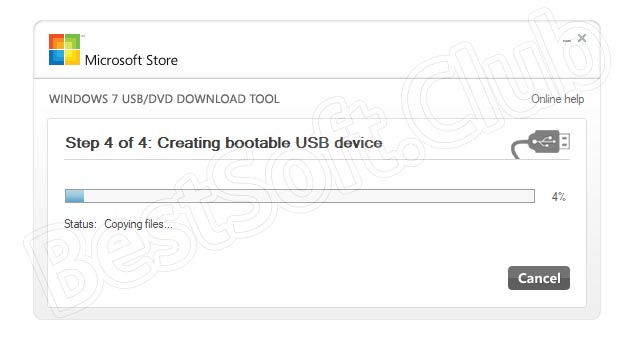
Either choose the erase route or cancel the operation. Once the disc or drive has been identified, click ‘Begin copying’. The final step is creating the bootable drive. A loading bar will be placed in the center of the page that details the progress of the root folder being combined with the DVD or USB port equipment.
When the integration is complete the window will display the text: ‘Bootable USB device created successfully’. To the right of the loading bar ‘100%’ will be present and below the bar, the status will read ‘Backup complete’.
Additional installer program
Rufus creates bootable discs and drives in a variety of formats. As the developer, Microsoft created the Windows USB DVD Tool for their single existing operating system: Windows 7, 8, 10, etc. Rufus is an impressive option that is recommended for anyone that wishes to create bootable equipment for free on other systems: Linux, UEFI, etc.
Follow the steps to install
The Windows USB DVD Download Tool provides succinct steps that are individually presented to install their system with a DVD or USB drive. There are four steps total.
This tool is compatible with the Windows 7 OS and above. Visit their official site to view any new versions and updates as well as the latest company news, terms, etc.
Запуск загрузочной флешки на ПК
Для установки операционной системы Windows 7, или операционной системы Windows 8, необходимо вставить флеш накопитель в USB разъем вашего компьютера.
После этого следует включить компьютер. В самом начале загрузки, нужно будет войти в «BIOS» (нажав на клавиатуре клавишу «Delеte» или на другую, которая указана внизу на экране монитора при запуске логотипа материнской платы вашего компьютера). В настройках «BIOS» необходимо будет выставить приоритет загрузки с USB накопителя.
После этого начинается процесс установки операционной системы Windows на компьютер. Сам процесс установки операционной системы точно такой, как с оптического DVD диска.
(1) Сравнение скорости работы Rufus и других приложений
Сравнения были проведены на компьютере с ОС Windows 7 x64 с процессором Core 2 duo, 4 ГБ RAM, с контроллером USB 3.0 и флешкой 16 ГБ USB 3.0 ADATA S102.
| • | Windows 7 x64 | en_windows_7_ultimate_with_sp1_x64_dvd_618240.iso |
| Windows 7 USB/DVD Download Tool v1.0.30 | 00:08:10 |
| Universal USB Installer v1.8.7.5 | 00:07:10 |
| UNetbootin v1.1.1.1 | 00:06:20 |
| RMPrepUSB v2.1.638 | 00:04:10 |
| WiNToBootic v1.2 | 00:03:35 |
| Rufus v1.1.1 | 00:03:25 |
| • | Ubuntu 11.10 x86 | ubuntu-11.10-desktop-i386.iso |
| UNetbootin v1.1.1.1 | 00:01:45 |
| RMPrepUSB v2.1.638 | 00:01:35 |
| Universal USB Installer v1.8.7.5 | 00:01:20 |
| Rufus v1.1.1 | 00:01:15 |
| • | Slackware 13.37 x86 | slackware-13.37-install-dvd.iso |
| UNetbootin v1.1.1.1 | 01:00:00+ |
| Universal USB Installer v1.8.7.5 | 00:24:35 |
| RMPrepUSB v2.1.638 | 00:22:45 |
| Rufus v1.1.1 | 00:20:15 |
What Is Windows USB/DVD Download Tool
Windows USB/DVD Download Tool is a native, free, and simple tool for creating Windows DVDs or USB flash drives. It can create a copy of Windows 7, Vista, or XP ISO file on a USB flash drive or a DVD.
To create a bootable DVD or USB, you have to download the ISO file and run the Windows USB/DVD Download Tool. Besides, you need to copy the ISO file to a media like USBs or DVDs. After that, you can directly install Windows 7 or Windows 8 from the USB flash drive or DVD.
Tip: 1.The copy of the ISO file created by Windows 7 USB/DVD Download Tool is bootable, which allows you to install Windows without running an existing operating system on the PC first. If you have configured the USB drive as the first boot in BIOS, you can directly run the Windows installation once you turned on the PC. 2. You can’t install Windows from the ISO file directly unless you copy it to a USB flash drive or a DVD via the Windows 10 USB/DVD Download Tool.
Also read: Chromebook Recovery Utility: How to Create and Use It