Начало работы с клиентом microsoft store
Содержание:
- Add a Remote Desktop connection
- Updates for version 1.2.790
- Updates for version 1.2.1844
- Groups
- Подключение к ПК с включенным удаленным доступом
- Какие плюсы и минусы в использовании протокола RDP?
- Troubleshooting
- Add a workspace
- Use a keyboard in a remote session
- Настройка Microsoft Remote Desktop на Mac для доступа к ПК
- Introduction
- Use the session selection bar
- Connecting to RD Broker without RD Gateway in Windows Server 2019
- Manage general app settings
Add a Remote Desktop connection
Now that you have the client on your device, you can add Remote Desktop connections to access your remote resources.
Before you add a connection, if you haven’t done so already, set up your PC to accept remote connections.
To add a Remote Desktop connection:
-
In the Connection Center, tap +, and then tap Desktop.
-
Enter the name of the remote PC into PC name. This name can be a Windows computer name, an Internet domain name, or an IP address. You can also append port information to the PC name (for example, MyDesktop:3389 or 10.0.0.1:3389). This field is the only required field.
-
Select the User name you use to access the Remote PC.
- Select Enter every time for the client to ask for your credentials every time you connect to the remote PC.
- Select Add user account to save an account that you use frequently so you don’t have to enter credentials every time you sign in. To learn more about user accounts, see .
-
You can also tap on Show additional options to set the following optional parameters:
- In Friendly name, you can enter an easy-to-remember name for the PC you’re connecting to. If you don’t specify a friendly name, the PC name is displayed instead.
- The Gateway is the Remote Desktop gateway you’ll use to connect to a computer from an external network. Contact your system administrator for more information.
- Sound selects the device your remote session uses for audio. You can choose to play sound on your local device, the remote device, or not at all.
- Customize display resolution sets the resolution for the remote session. When turned off, the resolution specified in global settings is used.
- Swap mouse buttons switches the commands sent by right and left mouse gestures. Ideal for left-handed users.
- Connect to admin session lets you connect to an admin session on the remote PC.
- Redirect local storage enables local storage redirection. This setting is disabled by default.
-
When you’re done, tap Save.
Need to edit these settings? Tap the More options menu (…) next to the name of the desktop, and then tap Edit.
Want to remove the connection? Again, tap the More options menu (…), and then tap Remove.
Tip
If you get an error name «0xf07» that says something like «We couldn’t connect to the remote PC because the password associated with the user account has expired,» try again with a new password.
Updates for version 1.2.790
Date published: 03/24/2020
- Renamed the «Update» action for Workspaces to «Refresh» for consistency with other Remote Desktop clients.
- You can now refresh a Workspace directly from its context menu.
- Manually refreshing a Workspace now ensures all local content is updated.
- You can now reset the client’s user data from the About page without needing to uninstall the app.
- You can also reset the client’s user data using msrdcw.exe /reset with an optional /f parameter to skip the prompt.
- We now automatically look for a client update when navigating to the About page.
- Updated the color of the buttons for consistency.
Updates for version 1.2.1844
Date published: 03/23/2021
- Updated background installation functionality to perform silently for the client auto-update feature.
- Fixed an issue where the client forwarded multiple attempts to launch a desktop to the same session. Depending on your group policy configuration, the session host can now allow the creation of multiple sessions for the same user on the same session host or disconnect the previous connection by default. This behavior wasn’t consistent before version 1.2.1755.
- Improved client logging, diagnostics, and error classification to help admins troubleshoot connection and feed issues.
- Updates for Teams on Azure Virtual Desktop, including the following:
- We’ve offloaded video processing (XVP) to reduce CPU utilization by 5-10% (depending on CPU generation). Combined with the hardware decode feature from February’s update, we’ve now reduced the total CPU utilization by 10-20% (depending on CPU generation).
- We’ve added XVP and hardware decode, which allows older machines to display more incoming video streams smoothly in 2×2 mode.
- We’ve also updated the WebRTC stack from version M74 to M88. M88 has better reliability, AV sync performance, and fewer transient issues.
- We’ve replaced our software H264 encoder with OpenH264. OpenH264 is an open-source codec that increases video quality of the outgoing camera stream.
- The client now has simultaneous shipping with 2×2 mode. 2×2 mode shows up to four incoming video streams simultaneously.
Groups
A group contains a list of servers and configuration information such as logon credentials. Configuration settings can be inherited from another group or the application defaults. Groups can be nested but are homogenous: a group may either contain groups or servers, but not both. All the servers in a group can be connected or disconnected at once.
When a group is selected in the tree view, the servers underneath it are displayed in a thumbnail view. The thumbnails can show the actual server windows or simply the connection status. Global thumbnail view properties can be adjusted via the tab while group/server-specific settings are in Display Settings.
Smart Groups
Smart groups are populated dynamically based on a set of rules. All ancestors of sibiling groups of the smart group are eligible for inclusion.
The Connected Virtual Group
When a server is in the connected state, it is automatically added the to Connected virtual group. Servers cannot be explicitly added or removed from the Connected group.
The Connected group can be toggled on/off via the View menu.
The Reconnect Virtual Group
There are sometimes situations where a server disconnects and will be intentionally offline for an unspecified length of time, e.g. when rebooting after an OS update. When this is the case, drag the server in question to the Reconnect group. RDCMan will continually attempt to connect to the server until it is successful.
The Reconnect group can be toggled on/off via the View menu.
The Favorites Virtual Group
The Favorites virtual group is a flat file of your favorite servers. You can add any server from the server tree. This is helpful when you have many servers in the tree and often work with a handful of servers from different groups.
The Favorites group can be toggled on/off via the View menu.
The Connect To Virtual Group
The Connect To Virtual Group contains the servers that are not members of user-created groups. See Ad Hoc Connections for details.
The Connect To group is visible while ad hoc connections exist and disappears when there are none.
The Recent Virtual Group
The Recent Virtual Group contains the servers that have been recently accessed.
The Recent group can be toggled on/off via the View menu.
Подключение к ПК с включенным удаленным доступом
В первую очередь нужно узнать IP-адрес компьютера или его имя в сети. Для этого выполняем следующие действия:
- Перейдите в центр управления сетями и общим доступом и кликните по вашему соединению;
- В открывшемся окошке нажмите «Сведения». Откроется еще одно окошко, в котором вам нужно найти пункт «Адрес IPv4» и записать его значение.
Узнав IP-адреса ПК в сети, подключаемся к нему с другого компьютера.
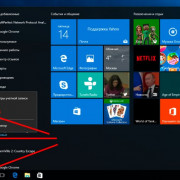
- Запустите клиент рабочего стола как было показано в разделе «Проверка версии клиента удаленного рабочего стола» и нажмите в левом нижнем углу «Показать параметры»;
- Введите в поля «Компьютер» и «Пользователь» записанный IP-адрес или название компьютера, а также имя залогиненного в удаленной системе пользователя;
- Нажмите «Подключить», введите пароль удаленного пользователя и проследуйте дальнейшим указаниям мастера. Если появится окошко с ошибкой проверки сертификата, проигнорируйте его, нажав «Да».
При необходимости вы можете настроить параметры удаленного доступа в окне клиента RDP. Всего в нём доступно шесть вкладок:
- Общие. Задается имя и адрес удаленного подключения. Имеется возможность сохранения настроек в файл, что позволяет выполнить подключение, запустив сохраненный файл (см. скрин выше).
- Экран. Можно задать свойства экрана, вернее его разрешение (по умолчанию стоит «полный экран»), а также количество цветов. Отметим, что для медленных соединений следует устанавливать наименьшую глубину цвета.
- Локальные ресурсы. Осуществляется настройка передачи звука по удаленной сети (по умолчанию стоит «разрешено»). Выполняется настройка сочетания клавиш. Настройка доступа к локальным ресурсам ПК, с которого выполняется подключение, то есть, запретить или разрешить доступ к дисководам, принтерам, жестким дискам, доступным вам при удаленной работе на ПК. Отметим, что подключенные диски можно увидеть на удаленном рабочем столе в окне «Компьютер».
- Взаимодействие. Позволяет настроить качество соединения.
- Программы. Осуществляется настройка запуска программ в автоматическом режиме после подключения.
- Дополнительно. Задаются профили для подключений и вручную настраиваются визуальные эффекты, доступные пользователю после подключения.
Какие плюсы и минусы в использовании протокола RDP?
Начнём с приятного – с плюсов. Плюс состоит в том, что этот инструмент, который правильней называть Клиентом RDP, доступен любому пользователю Windows как на компьютере, с которого предстоит управлять удалённым, так и тому, кто хочет к своему компьютеру удалённый доступ открыть.
Через подключение к удалённому рабочему столу возможно не только видеть удалённый рабочий стол и пользоваться ресурсами удалённого компьютера, так и подключать к нему локальные диски, принтеры, смарткарты и т.п. Конечно, если вы захотите посмотреть видео или послушать музыку через RDP – вряд ли этот процесс доставит вам удовольствие, т.к. в большинстве случаев вы увидите слайд шоу, и звук скорей всего будет прерываться. Но, не под эти задачи разрабатывалась служба RDP.
Ещё одним несомненным плюсом является то, что подключение к компьютеру осуществляется безо всяких дополнительных программок, которые в большинстве своём платные, хотя и имеют свои достоинства. Время доступа к RDP-серверу (которым и является ваш удалённый компьютер) ограничивается лишь вашим желанием.
Минусов всего два. Один существенный, другой – не очень. Первый и существенный – для работы с RDP компьютер, к которому осуществляется подключение, должен иметь белый (внешний) IP, либо на этот компьютер должна быть возможность «пробросить» порт с маршрутизатора, который опять же должен иметь внешний IP. Статическим он будет или динамическим – значения не имеет, но он должен быть.
Второй минус – не такой существенный – последние версии клиента перестали поддерживать 16-цветную цветовую схему. Минимум – 15бит. Это сильно замедляет работу по RDP, когда вы подключаетесь по чахлому-дохлому интернету со скоростью, не превышающей 64 килобита в секунду.
Troubleshooting
If a user reports any of the following issues when opening the web client for the first time, the following sections will tell you what to do to fix them.
What to do if the user’s browser shows a security warning when they try to access the web client
The RD Web Access role might not be using a trusted certificate. Make sure the RD Web Access role is configured with a publicly trusted certificate.
If that doesn’t work, your server name in the web client URL might not match the name provided by the RD Web certificate. Make sure your URL uses the FQDN of the server hosting the RD Web role.
If the user reports that they can’t connect with the web client even though they can see the resources listed, check the following things:
- Is the RD Gateway role properly configured to use a trusted public certificate?
- Does the RD Gateway server have the required updates installed? Make sure that your server has the KB4025334 update installed.
If the user gets an «unexpected server authentication certificate was received» error message when they try to connect, then the message will show the certificate’s thumbprint. Search the RD Broker server’s certificate manager using that thumbprint to find the right certificate. Verify that the certificate is configured to be used for the RD Broker role in the Remote Desktop deployment properties page. After making sure the certificate hasn’t expired, copy the certificate in .cer file format to the RD Web Access server and run the following command on the RD Web Access server with the bracketed value replaced by the certificate’s file path:
Diagnose issues with the console log
If you can’t solve the issue based on the troubleshooting instructions in this article, you can try to diagnose the source of the problem yourself by watching the console log in the browser. The web client provides a method for recording the browser console log activity while using the web client to help diagnose issues.
- Select the ellipsis in the upper-right corner and navigate to the About page in the dropdown menu.
- Under Capture support information select the Start recording button.
- Perform the operation(s) in the web client that produced the issue you are trying to diagnose.
- Navigate to the About page and select Stop recording.
- Your browser will automatically download a .txt file titled RD Console Logs.txt. This file will contain the full console log activity generated while reproducing the target issue.
The console may also be accessed directly through your browser. The console is generally located under the developer tools. For example, you can access the log in Microsoft Edge by pressing the F12 key, or by selecting the ellipsis, then navigating to More tools > Developer Tools.
Add a workspace
Subscribe to the feed your admin gave you to get the list of managed resources available to you on your macOS device.
To subscribe to a feed:
- Select Add feed on the main page to connect to the service and retrieve your resources.
- Enter the feed URL. This can be a URL or email address:
- If you’re accessing resources from Azure Virtual Desktop or Windows 365, you can use one of the following URLs:
- For Azure Virtual Desktop (classic), use .
- For Azure Virtual Desktop, use .
- If you’re using Windows 365, use: .
- To use email, enter your email address. This tells the client to search for a URL associated with your email address if your admin configured the server that way.
- If you’re accessing resources from Azure Virtual Desktop or Windows 365, you can use one of the following URLs:
- Select Subscribe.
- Sign in with your user account when prompted.
After you’ve signed in, you should see a list of available resources.
Once you’ve subscribed to a feed, the feed’s content will update automatically on a regular basis. Resources may be added, changed, or removed based on changes made by your administrator.
Export and import connections
You can export a remote desktop connection definition and use it on a different device. Remote desktops are saved in separate RDP files.
To export an RDP file:
- In the Connection Center, right-click the remote desktop.
- Select Export.
- Browse to the location where you want to save the remote desktop RDP file.
- Select OK.
To import an RDP file:
- In the menu bar, select File > Import.
- Browse to the RDP file.
- Select Open.
Use a keyboard in a remote session
Mac keyboard layouts differ from the Windows keyboard layouts.
- The Command key on the Mac keyboard equals the Windows key.
- To perform actions that use the Command button on the Mac, you will need to use the control button in Windows (for example Copy = Ctrl+C).
- The function keys can be activated in the session by pressing additionally the FN key (for example, FN+F1).
- The Alt key to the right of the space bar on the Mac keyboard equals the Alt Gr/right Alt key in Windows.
By default, the remote session will use the same keyboard locale as the OS you’re running the client on. (If your Mac is running an en-us OS, that will be used for the remote sessions as well.) If the OS keyboard locale is not used, check the keyboard setting on the remote PC and change it manually. See the Remote Desktop Client FAQ for more information about keyboards and locales.
Настройка Microsoft Remote Desktop на Mac для доступа к ПК
Чтобы получить доступ ко всем файлам, приложениям и работе на ПК с Windows через устройство MacBook или MacOS, все, что вам нужно сделать, – это воспользоваться бесплатным инструментом Удаленный рабочий стол для Mac , предоставленным Microsoft. Для использования удаленного рабочего стола вам потребуется Windows 10 Pro или Enterprise. Настроить удаленный рабочий стол на Mac очень просто. В этой статье мы подробно объясняем, как установить и настроить Microsoft Remote Desktop для Mac для управления ПК с Windows.
Включить удаленный рабочий стол на ПК с Windows

Чтобы включить удаленный рабочий стол, на компьютере с Windows перейдите в меню Пуск и нажмите Настройки.
Перейдите в Система и выберите параметр Удаленный рабочий стол в левой части меню.
Чтобы включить удаленный рабочий стол, включите параметр Удаленный рабочий стол .
Нажмите кнопку Подтвердить в небольшом всплывающем окне.
Убедитесь, что ваш компьютер всегда активен для удаленного подключения. Измените настройки режима сна на never в параметре удаленного рабочего стола.
Прежде чем переключиться на Mac, чтобы настроить клиент удаленного рабочего стола, необходимо сначала собрать информацию о вашем IP-адресе Windows и имени компьютера.
Чтобы узнать имя своего ПК в том же окне удаленного рабочего стола, перейдите на страницу Как подключиться к этому ПК.
Под этим запишите имя вашего ПК.
Чтобы получить IP-адрес вашего ноутбука, перейдите в настройки и нажмите Сеть и Интернет.
Нажмите Wi-Fi и выберите сетевое подключение.
Запишите свой IPv4-адрес из списка Свойства .

Еще один простой способ начать работу – загрузить простую программу под названием Microsoft Remote Desktop Assistant на свой ПК с Windows. Помощник по удаленным рабочим столам автоматически изменит параметры удаленного подключения и разблокирует порты брандмауэра, чтобы разрешить удаленный рабочий стол. Программа обеспечивает удаленное подключение и поддерживает ваш компьютер в состоянии сна после установки. Выполните следующие действия, чтобы установить помощник по удаленному рабочему столу на ПК с Windows.
При установке нажмите Начало работы , чтобы изменить настройки удаленного подключения.
После этого на экране отобразится информация для подключения, такая как имя ПК, имя пользователя, QR-код, которые вам понадобятся для добавления вашего ПК к удаленному устройству.
Теперь переключитесь на MacBook, чтобы настроить Microsoft Remote Desktop
Установите и настройте Microsoft Remote Desktop для Mac
На вашем Mac перейдите в App Store и найдите Microsoft Remote Desktop.
Нажмите кнопку Получить , чтобы загрузить приложение.
После этого запустите приложение и нажмите кнопку ‘+’ в верхней части окна Microsoft Remote Desktop .
Выберите «Рабочий стол» в раскрывающемся меню и введите все данные, такие как имя ПК или IP-адрес, который вы указали ранее. Вам также предоставляется возможность настроить шлюз для подключения виртуальных рабочих столов или рабочих столов на основе сеансов к сети вашей компании, если это необходимо.

Введите учетные данные домена, такие как имя пользователя, пароль для вашего ПК, чтобы установить удаленное подключение. Эти поля являются обязательными, так как они понадобятся вам для входа на ПК через удаленное соединение.

После этого нажмите кнопку Добавить .
Вы также можете настроить отображение компьютера на удаленном рабочем столе, внеся изменения в личные настройки в настройках, такие как цвета, режимы экрана и разрешение.
Чтобы сохранить список, нажмите красную кнопку в верхней части окна.
Теперь выберите свое имя пользователя в разделе MyDesktops и нажмите Пуск в верхней части окна, чтобы запустить удаленное подключение.
Нажмите Продолжить во всплывающем окне подтверждения сертификата.
После этого вы сможете увидеть, что ваш ПК с Windows будет отображаться в полноэкранном режиме на вашем MacBook или MacOS.
Чтобы внести какие-либо изменения в соединение, нажмите Изменить в верхней части окна Microsoft Remote Desktop.
Чтобы изменить настройки или добавить шлюз, нажмите Настройки в верхней части окна Microsoft Remote Desktop.
Это все.
Introduction
RDCMan manages multiple remote desktop connections. It is useful for managing server labs where you need regular access to each machine such as automated checkin systems and data centers.
Servers are organized into named groups. You can connect or disconnect to all servers in a group with a single command. You can view all the servers in a group as a set of thumbnails, showing live action in each session. Servers can inherit their logon settings from a parent group or a credential store. Thus when you change your lab account password, you only need to change the password stored by RDCMan in one place. Passwords are stored securely by encrypting with either CryptProtectData using the (locally) logged on user’s authority or an X509 certificate.
User with OS versions prior to Win7/Vista will need to get version 6 of the Terminal Services Client. You can obtain this from the Microsoft Download Center: XP; Win2003
Upgrade note: RDG files with this version of RDCMan are not compatible with older program versions. Any legacy RDG file opened and saved with this version will be backed up as filename.old
Use the session selection bar
You can have multiple connections open to different PCs at the same time. Tap the connection bar to display the session selection bar on the left side of the screen. The session selection bar lets you view your open connections and switch between them.
When you’re connected to remote resources, you can switch between apps within that session by tapping the expander menu ( > ) and choosing from the list of available items.
To start a new session within your current connection, tap Start New, then choose from the list of available items.
To disconnect a session, tap X in the left side of the session tile.
Connecting to RD Broker without RD Gateway in Windows Server 2019
This section describes how to enable a web client connection to an RD Broker without an RD Gateway in Windows Server 2019.
Setting up the RD Broker server
Follow these steps if there is no certificate bound to the RD Broker server
-
Open Server Manager > Remote Desktop Services.
-
In Deployment Overview section, select the Tasks dropdown menu.
-
Select Edit Deployment Properties, a new window titled Deployment Properties will open.
-
In the Deployment Properties window, select Certificates in the left menu.
-
In the list of Certificate Levels, select RD Connection Broker — Enable Single Sign On. You have two options: (1) create a new certificate or (2) an existing certificate.
Follow these steps if there is a certificate previously bound to the RD Broker server
-
Open the certificate bound to the Broker and copy the Thumbprint value.
-
To bind this certificate to the secure port 3392, open an elevated PowerShell window and run the following command, replacing «< thumbprint >» with the value copied from the previous step:
Note
To check if the certificate has been bound correctly, run the following command:
In the list of SSL Certificate bindings, ensure that the correct certificate is bound to port 3392.
-
Open the Windows Registry (regedit), go to and locate the key WebSocketURI. Next, set the value to .
Setting up the RD Session Host
Follow these steps if the RD Session Host server is different from the RD Broker server:
-
Create a certificate for the RD Session Host machine, open it and copy the Thumbprint value.
-
To bind this certificate to the secure port 3392, open an elevated PowerShell window and run the following command, replacing «< thumbprint >» with the value copied from the previous step:
Note
To check if the certificate has been bound correctly, run the following command:
In the list of SSL Certificate bindings, ensure that the correct certificate is bound to port 3392.
-
Open the Windows Registry (regedit) and navigate to and locate the key WebSocketURI. The value must be set to .
-
Ensure that both the RD Session Host and RD Broker server are running Windows Server 2019.
-
Ensure that public trusted certificates are configured for both the RD Session Host and RD Broker server.
Note
If both the RD Session Host and the RD Broker server share the same machine, set the RD Broker server certificate only. If the RD Session Host and RD Broker server use different machines, both must be configured with unique certificates.
-
The Subject Alternative Name (SAN) for each certificate must be set to the machine’s Fully Qualified Domain Name (FQDN). The Common Name (CN) must match the SAN for each certificate.
Manage general app settings
To change the general app settings, go to the Connection Center, tap Settings, and then tap General.
You can set the following general settings:
- Show desktop previews lets you see a preview of a desktop in the Connection Center before you connect to it. This setting is enabled by default.
- Pinch to zoom remote session lets you use pinch-to-zoom gestures. If the app you’re using through Remote Desktop supports multi-touch (introduced in Windows 8), disable this feature.
- Enable Use scancode input when available if your remote app doesn’t respond properly to keyboard input sent as scancode. Input is sent as unicode when disabled.
- Help improve Remote Desktop sends anonymous data about how you use Remote Desktop for Android to Microsoft. We use this data to improve the client. To learn more about our privacy policy and what kinds of data we collect, see the Microsoft Privacy Statement. This setting is enabled by default.